Columns help organize information into clear sections, making them particularly useful for comparisons, pros and cons, feature lists, side-by-side explanations, and text-heavy slides. Knowing how to make columns in Google Slides can help you present this information more clearly.
Google Slides does not offer a built-in command that automatically divides text into columns as Google Docs does. There is, however, a way around this limitation.
In this guide, you will learn how to recreate the same effect using slide layouts, separate text boxes, or tables, depending on your content and design needs.
Key Takeaways
- Use a two-column slide layout to set up columns quickly.
- Create separate text boxes for more control over positioning and spacing.
- Use tables for structured information and evenly aligned columns.
- Duplicate and align text boxes to create three or more columns.
Can You Make Columns Inside a Google Slides Text Box?
No. Google Slides does not currently offer the Google Docs-style Format → Columns command that divides text inside a single text box. Instead, each text box in Slides works as an independent object.
If you want Google Slides columns in text box layouts, you can recreate the effect in three ways:
- Slide layouts: Use predefined content placeholders arranged side by side.
- Separate text boxes: Create independent text areas that you can position and resize.
- Tables: Place content in separate cells for consistent alignment.
Your choice should depend on whether you prioritize speed, design flexibility, or structured content.
How to Make Columns in Google Slides
There are three practical ways to create columns in Google Slides. Here is how each method works.
Method 1: Use a Two-Column Slide Layout
This is the ideal option if you want to create columns quickly in Google Slides without manually arranging individual elements. It works well for two-column slides such as pros-and-cons slides and product comparisons.
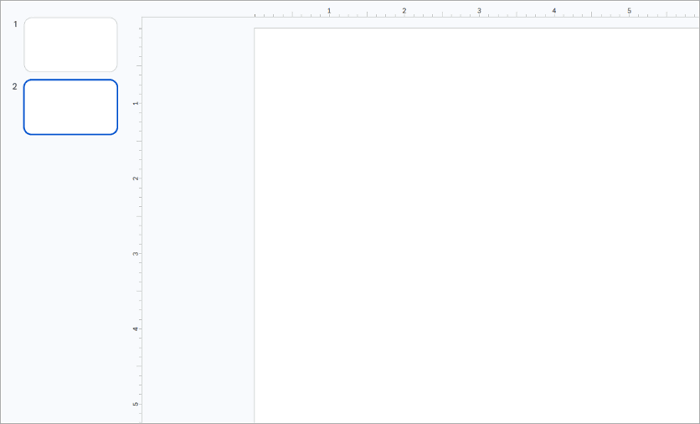
Step 1: Select the slide you want to edit.
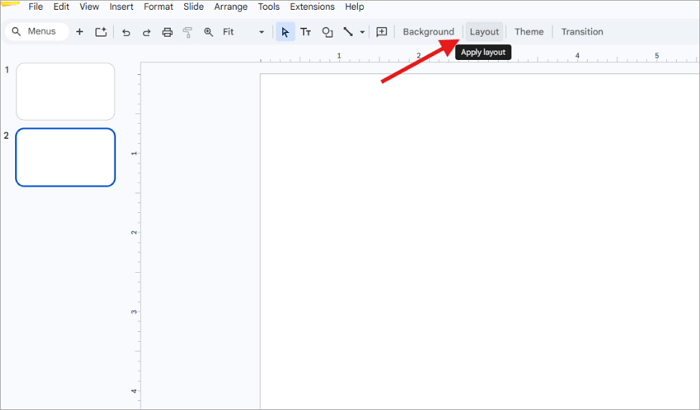
Step 2: Click Layout in the toolbar or open the Slide menu and select Apply layout.
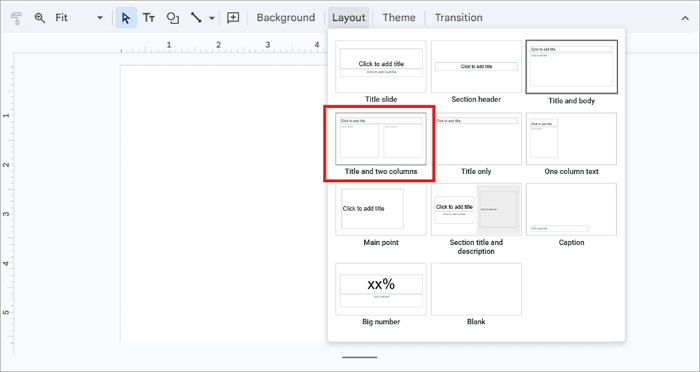
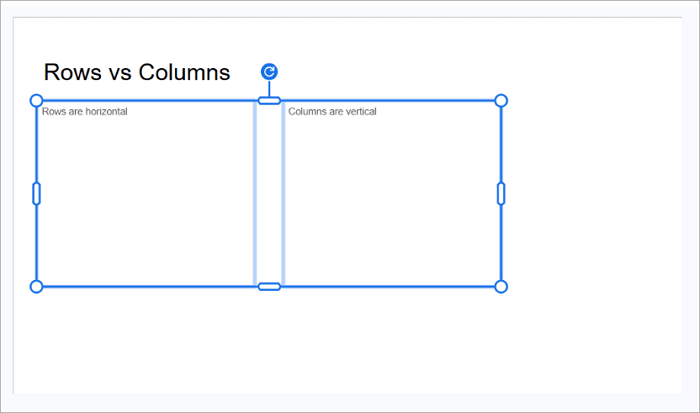
Step 3: Choose a layout with two side-by-side content areas, such as Title and two columns, where available.
Step 4: Click each placeholder and enter your content.
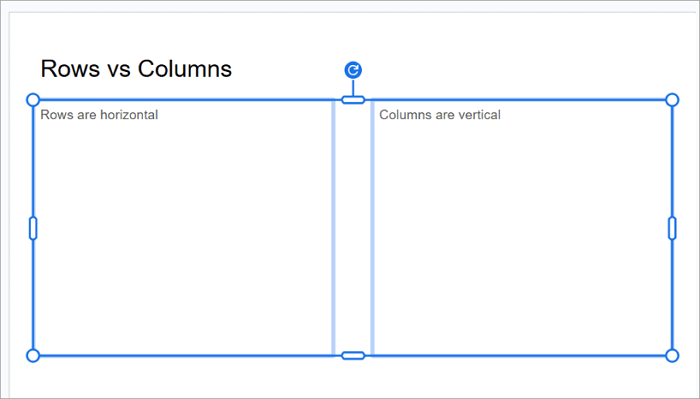
Step 5: Resize or reposition the placeholders if you need to adjust the spacing.
Method 2: Create Columns with Text Boxes
Do you want to give each column a different width, add images beside text, or position content wherever you need it? This is where adding separate text boxes comes in handy.
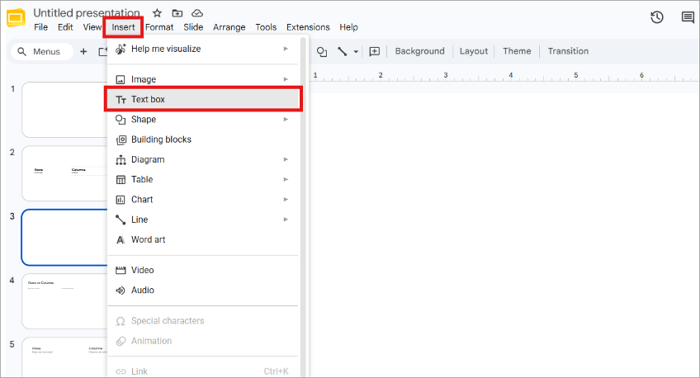
Step 1: Open the slide and select Insert → Text box.
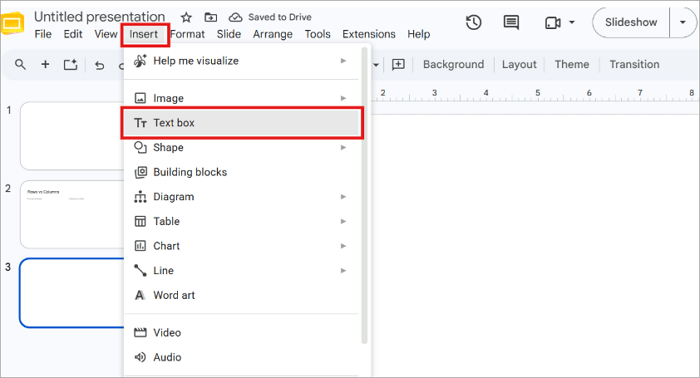
Step 2: Click and drag on the slide to draw your first text box.

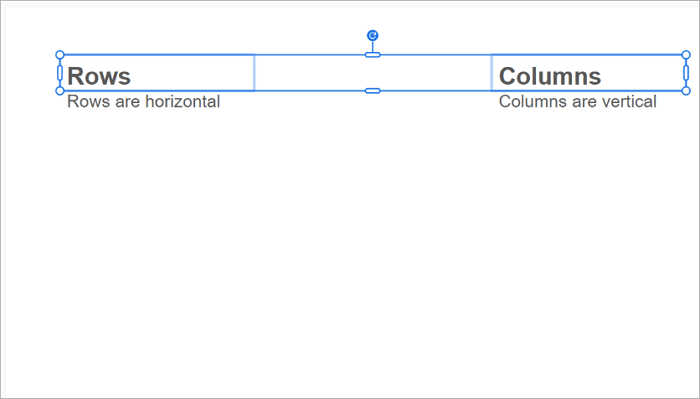
Step 3: Enter your heading and body text. Then click the text box border and press Ctrl + D (Windows) or Cmd + D (Mac) to duplicate it.
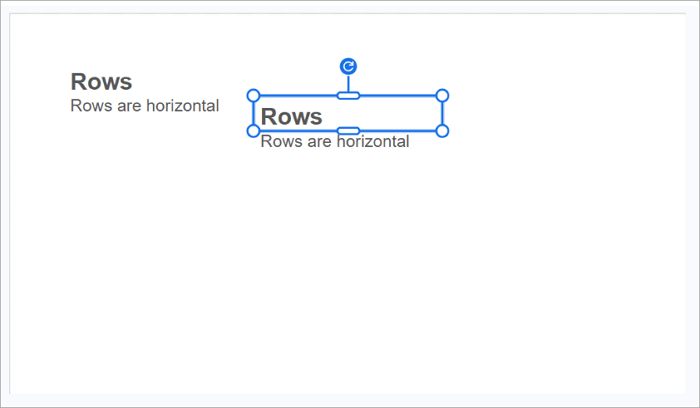
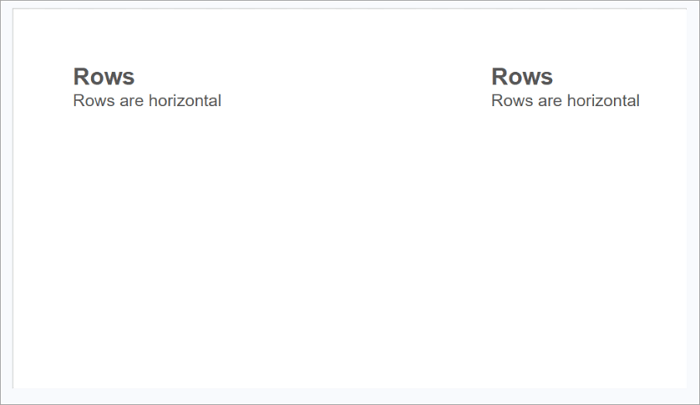
Step 4: Place the boxes side by side and adjust them to similar widths and align their top edges.
Method 3: Use a Table
This method works best when your columns contain related information that must stay aligned, such as product features, prices, or advantages and disadvantages.
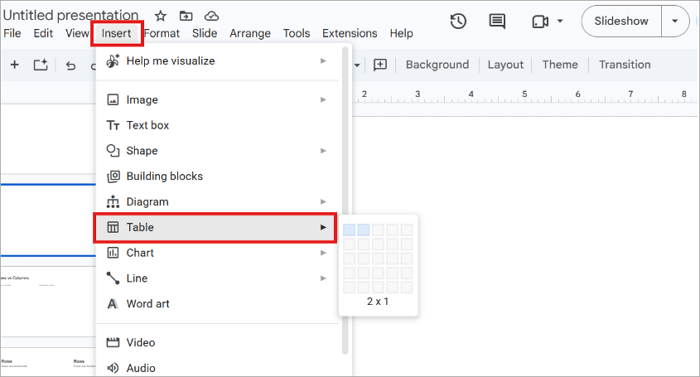
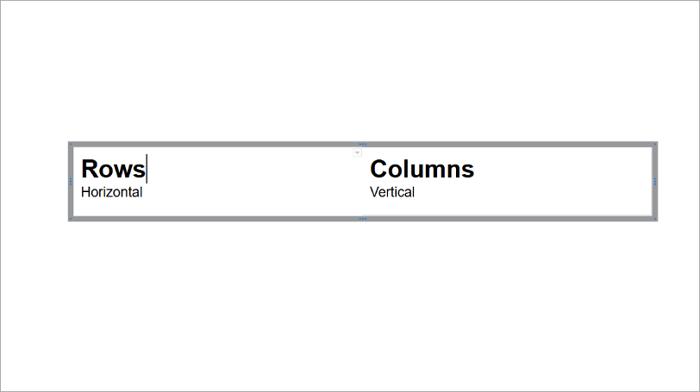
Step 1: Open the slide, go to Insert → Table, and choose a layout such as 2 × 1 for two columns and one row.
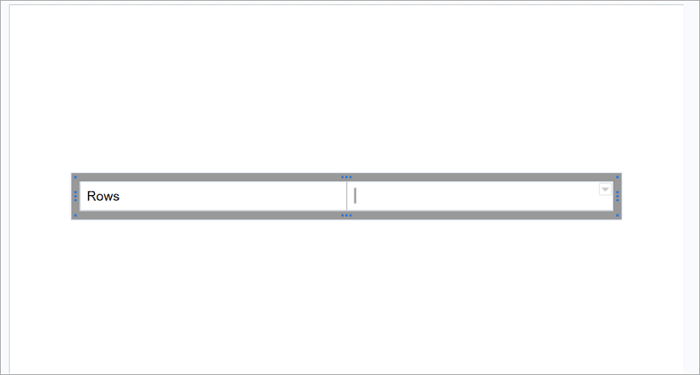
Step 2: Click each cell and enter your content.
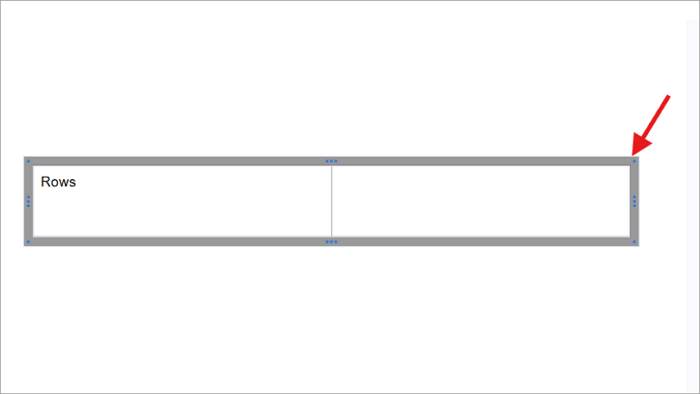
Step 3: Drag the table’s edges to adjust its overall size. You can also resize individual columns by dragging their dividing line.
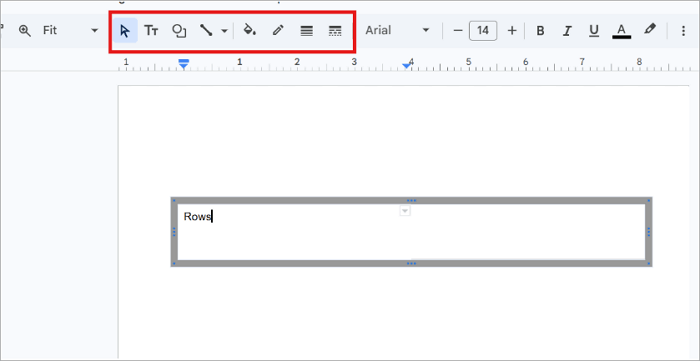
Step 4: Customize the border color, thickness, or cell fill to match your presentation design.
How to Make Two Columns in Google Slides
To make two columns in Google Slides, the built-in two-column layout is the quickest method. Separate boxes may be better if your slide requires different widths, independent positioning, images beside text, or more control over spacing. For highly structured text or data, insert a 2 x 1 table instead.
Here is a quick comparison of the three methods:
1️⃣ Layout (fastest): Select a two-column slide layout and enter content in each placeholder.
2️⃣ Text boxes (most flexible): Insert two text boxes and position them side by side.
3️⃣ Table (easiest to keep aligned): Insert a two-column table when comparing data or organizing related information.
How to Add Three or More Columns in Google Slides
Google Slides may not provide a ready-made layout for every number of columns. You can create a custom arrangement using text boxes instead.
Step 1: Go to Insert → Text box and draw a text box at the desired size.
Step 2: Press Ctrl/Cmd + D to duplicate the text box as many times as you need. Resize the text boxes if necessary.
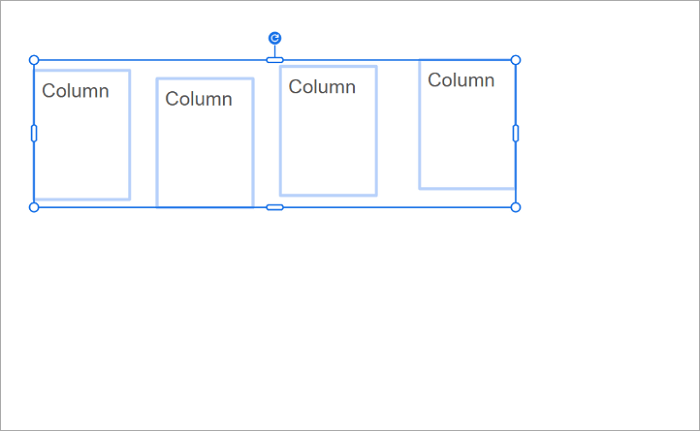
Step 3: Position the boxes across the slide and adjust their widths.
Step 4: Select the boxes and use Arrange → Align and the available distribution options to space them evenly.
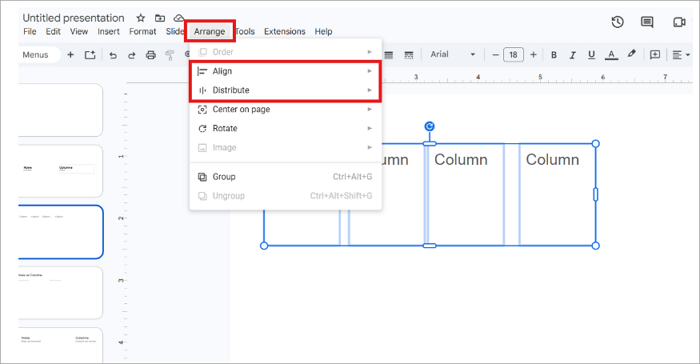
Alternatively, insert a table with the required number of columns if the content needs precise alignment. Avoid creating too many narrow columns, as they can make your presentation difficult to read.
To keep multiple columns readable, follow these visual presentation design tips for spacing, alignment, and consistent styling.
Conclusion
It might seem like a small detail, but knowing how to make columns in Google Slides can help you create more effective presentations. You can easily present comparisons, feature lists, and detailed information without overwhelming your audience.
However, you do not just choose a layout based on the number of available columns. Instead, consider the kind of content you want to present. Short, parallel points may suit text boxes, while data is better suited to tables.
Choose a slide layout, separate text boxes, or a table and test the method that best suits your next slide.
FAQs About Columns in Google Slides
These answers cover common questions about creating and arranging columns in Google Slides.
1. How do I make two columns in Google Slides?
To create two columns for a Google Slides presentation:
- Select your slide and click Layout in the toolbar.
- Choose a two-column layout.
- Enter your content in each placeholder.
- Alternatively, use Insert → Text box to create two independent boxes.
- Then position them side by side and adjust their widths.
2. Can I make columns in one Google Slides text box?
Google Slides does not currently support automatic text columns inside a single text box. To recreate the Google Slides columns effect:
- Select Insert → Text box.
- Create the first column and duplicate it.
- Position the second box beside the first and adjust both widths to create a consistent layout.
3. Which method is best for comparison slides?
The best method for simple comparisons, such as comparing two products or listing pros and cons, is the two-column layout. Separate text boxes work better when each side needs different formatting or images, while tables are preferable when you need to compare structured details, prices, specifications, or several features across multiple options.