Trying to change margin settings in your PowerPoint presentation? You may have found this harder than expected. Unlike Microsoft Word, PowerPoint has no global margin setting.
When it comes to PowerPoint margins, you may want to adjust the spacing from the slide edges, the padding inside a text box or shape, or the space between text and table borders.
This guide covers all three, so you can quickly choose the fix that matches your problem.
Key Takeaways:
- Internal Margin settings control text boxes and shapes.
- Cell Margins control table cell padding.
- Guides help create consistent visual slide margins.
- Use Slide Master to establish spacing rules across the whole presentation.
What Are Margins in PowerPoint?
Margins are the space between content and an edge. In PowerPoint, they can either be internal or slide margins. The method you need depends on which type of spacing you want to adjust.
1. Slide margins
These are visual boundaries that keep content away from the edges of your slide. You can create them with guides and use the area inside them as your safe zone. Note that these guides do not lock or restrict objects. They simply help with alignment.
2. Text box and shape margins
These margins control the space between text and the inside of an object such as a text box or shape. You can adjust the Left, Right, Top, and Bottom margins independently.
3. Table cell margins
Table cell margins set the padding between text and individual cell borders. Increasing the padding gives content more breathing room, while reducing it lets you fit more information into the same table.
How to Change Margins in a PowerPoint Text Box or Shape
This is the quickest way to change margins in PowerPoint when your text looks too close to the edge of a box or does not fit comfortably. If you need to create a text box first, see this guide on how to add a text box in PowerPoint.
Practical tip: Reducing the margins can also help when text is overflowing. Instead of immediately shrinking the font, try giving the text a little more usable space inside the box.
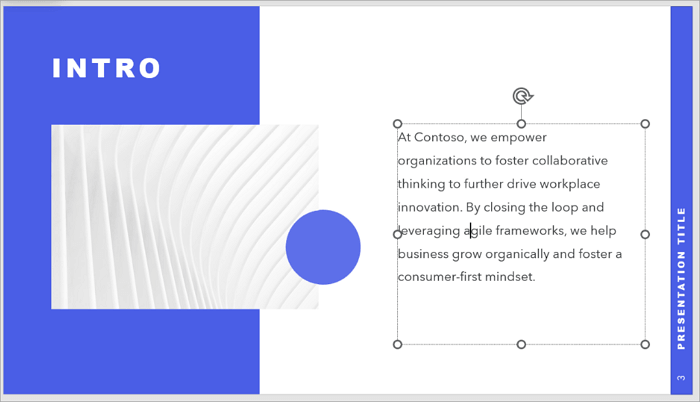
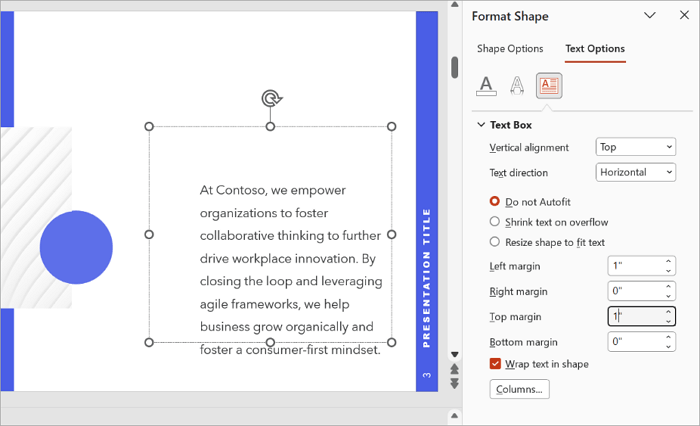
Step 1: Select the text box or shape you want to edit in your presentation.
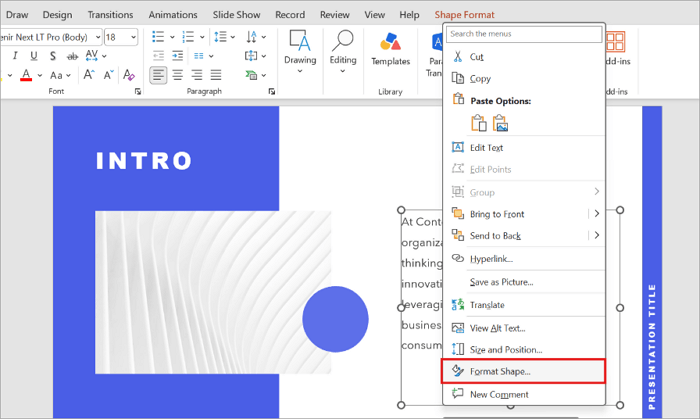
Step 2: Right-click it and select Format Shape.
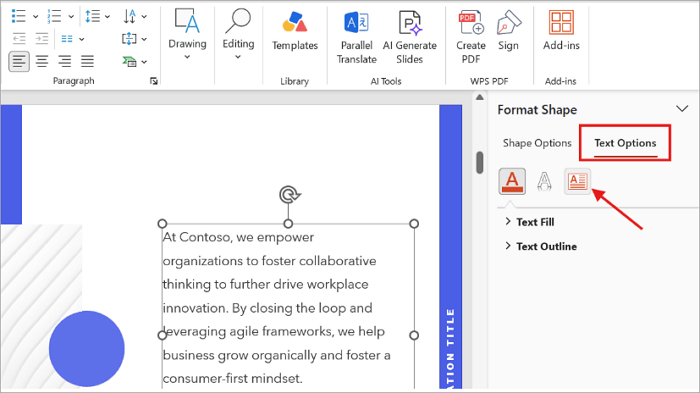
Step 3: In the Format Shape pane that opens on the right, go to Text Options and select Textbox.
Step 4: Change the Left, Right, Top, and Bottom margin values. Note that smaller values create more room for text inside the object, while larger values add breathing space.
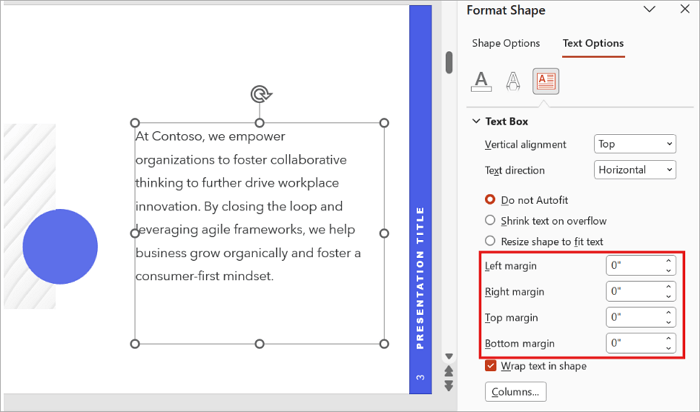
Step 5: Your changes are applied automatically.
How to Change Margins in PowerPoint Tables
Tables use a separate margin setting because the spacing applies inside cells rather than around the entire table. This approach is useful when a table has too much space or when its text is difficult to read.
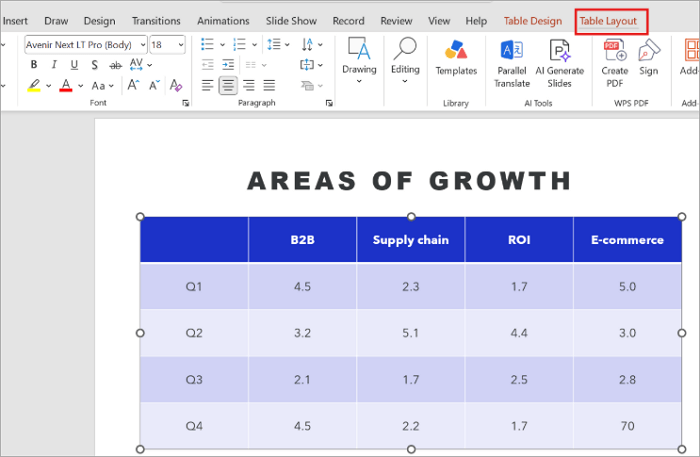
Step 1: Select the table on your slide and open the Table Layout tab.
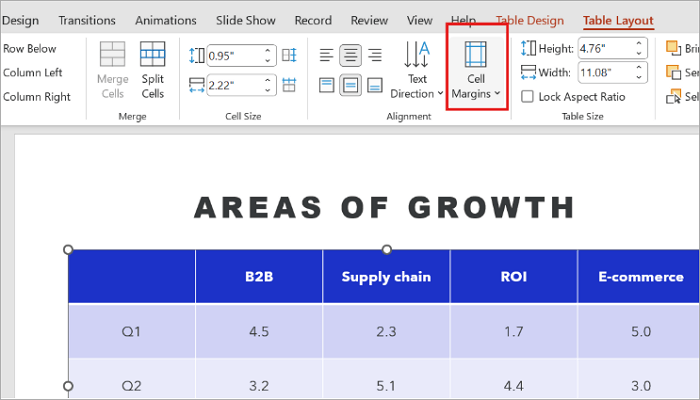
Step 2: Open Cell Margin in the Alignment group.
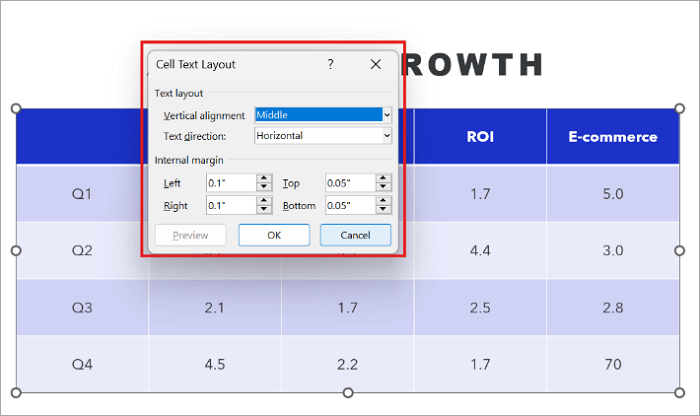
Step 3: Choose one of the available presets or go to Custom Margins for more control. Note that this setting changes padding inside cells, not the slide margin.
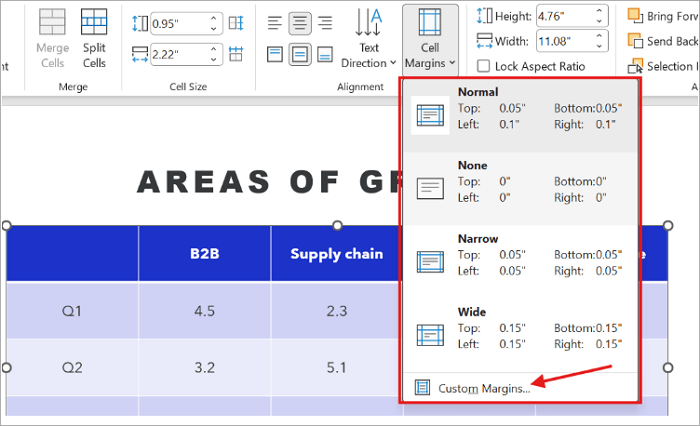
Step 4: Enter values for the Top, Bottom, Left, and Right margins and click OK. Avoid making the cell margins so small that the text touches the borders.
How to Create Slide Margins in PowerPoint Using Guides
Since there is no way to adjust margins in PowerPoint slide pages, you can create a visual safe zone using guides. This approach gives you a consistent boundary for placing text, images, charts, and other objects.
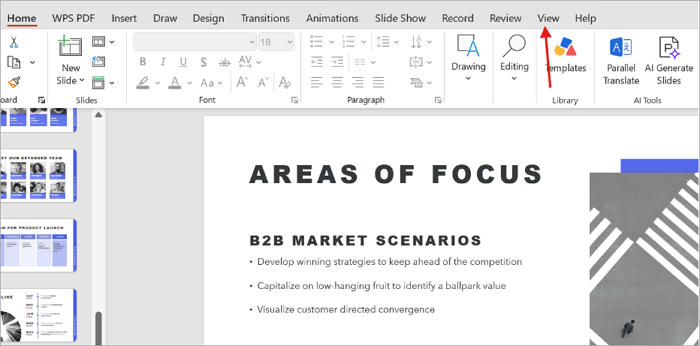
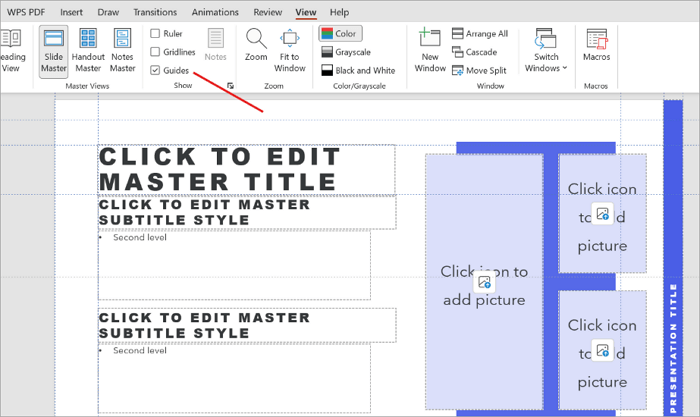
Step 1: Open the View tab in your PowerPoint presentation.
Step 2: Turn on Guides in the Show group. You can also enable Ruler for easier positioning.
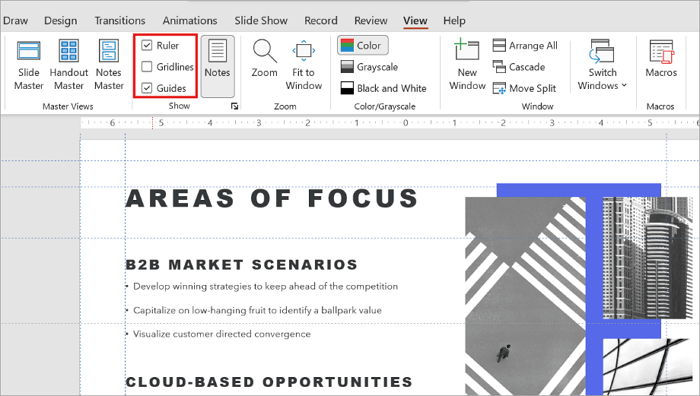
Step 3: Drag the vertical and horizontal guides toward the slide edges and position them at the distance you want to maintain from each edge.

How to Set Consistent Margins Across an Entire Presentation
Manually adjusting margins on every slide of a presentation can quickly become frustrating, especially if it is a large deck. This is where Slide Master comes in, providing a better way to establish recurring spacing, placeholder positions, and layout rules.
Any change you make to the main master can influence the layouts beneath it, while changes made to an individual layout apply only to slides using that layout.
Step 1: Open the View tab in PowerPoint and select Slide Master.
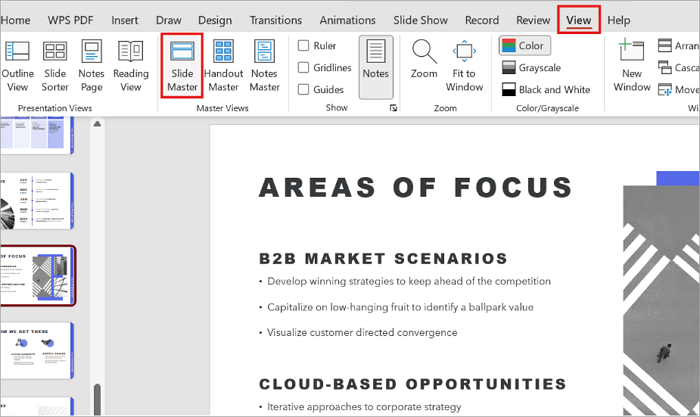
Step 2: Go to the main master or the layout you want to edit.
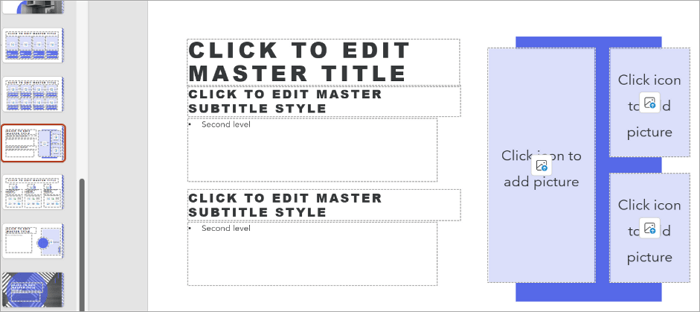
Step 3: Add or reposition guides via View > Guides to establish a safe zone for your slides.
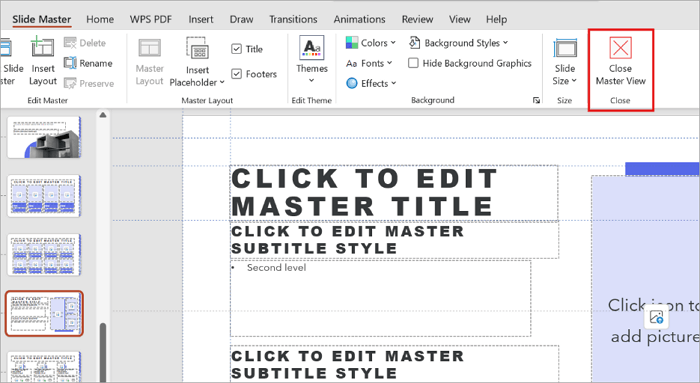
Step 4: Adjust the position and size of placeholders and set internal margins for text placeholders where needed. Then click Close Master View to return to your presentation.
What Margin Size Should You Use in PowerPoint?
There is no universal margin size for every presentation. The right setting depends on your content density, slide style, aspect ratio, and whether the presentation will be viewed on screen or printed.
As general design suggestions:
- Wider margins create a cleaner, more spacious appearance.
- Moderate margins work well for most business slides.
- Narrow margins provide more room for content but can make a slide feel crowded.
Some presentation design guidelines use margins of roughly 2.5 cm, 1.5 cm, or 0.5 cm, depending on how much space your design needs.
A common approach for most 16:9 presentations is to use around 1/20 of the slide width as a starting point for the safe area. You can then adjust the spacing based on the amount of content and the overall visual style of the deck.
Conclusion
Consistent PowerPoint margins make slides easier to read and reduce the amount of time you spend fixing layouts later.
Before building a large deck, set your slide safe zone and decide how much internal spacing your text boxes and tables need. Establishing these spacing rules early makes it easier to keep every slide consistent.
If you regularly need to adjust margins in PowerPoint, a tool such as PPT Productivity can also help speed up repetitive margin changes.
Learn More About PowerPoint Margins
Below are quick answers to the questions people ask most about PowerPoint margins, each with short steps you can follow.
1. Can you set margins for an entire PowerPoint slide?
Yes, you can. While PowerPoint does not offer a global slide margin like Word, you can create a visual equivalent with guides. Here’s how to go about it:
- Go to the View tab.
- Turn on Guides and Ruler.
- Move the guides inward from the slide edges.
- Use the area inside the guides as your safe zone.
You can also set guides and placeholder positions in Slide Master for more consistent layouts.
2. How do I reduce margins in a PowerPoint text box?
To reduce the margin values in your text box:
- Right-click the text box and select Format Shape.
- Select Text Options and navigate to Textbox.
- Under Internal Margin, reduce the Top, Bottom, Left, or Right values.
Note that smaller internal margins give the text more usable space inside the box.
3. How do I change table cell margins in PowerPoint?
Here’s how to adjust table cell margins in your presentation:
- Select the table.
- Open the Table Layout tab.
- Go to Cell Margins and select a preset.
- Alternatively, choose Custom Margins.
- Enter your preferred Top, Bottom, Left, and Right values and click OK.