You just arranged a set of icons, shapes, images, and labels exactly how you want them on your slide. But then the whole spacing gets ruined when you move each piece separately.
This is why you should know how to group in Google Slides: it lets you turn multiple elements into a single unit you can move around. Once grouped, you can reposition, resize, copy, or organize related objects without disturbing their arrangement.
This guide explores grouping in Google Slides, editing objects within a group, ungrouping elements, and common problems you may encounter along the way.
Key Takeaways:
- Select multiple objects and use Arrange > Group to combine them.
- Use groups to move, resize, copy, and reposition related slide elements.
- Edit individual objects without necessarily ungrouping the entire group.
- Use Arrange > Ungroup when you need to separate the elements again.
- Check that you’ve selected at least two elements if the Group option is unavailable.
How to Group Objects in Google Slides
Grouping comes in handy when several elements belong together visually. For example, you might have a circular icon, a text label, and a rounded rectangle forming one infographic component.
Here’s how to group objects in Google Slides:
Step 1: Open your presentation and go to the slide containing the objects.

Step 2: Select the first object you want to group. Then hold Shift and select the other objects. You can also click and drag around multiple objects to select them at once.

Step 3: With the objects selected, click Arrange in the top menu and select Group. You should now be able to move the objects as a group.
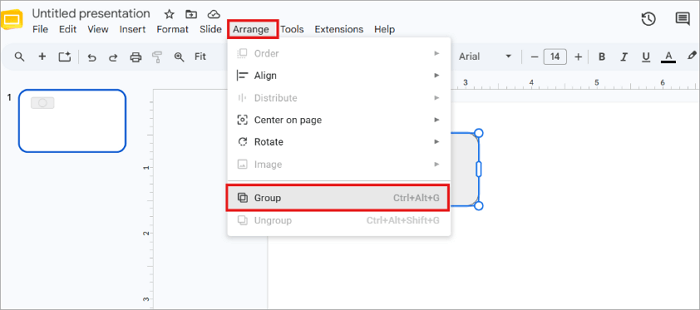
Google Slides also offers a right-click option, so you can select the objects, right-click one of them, and choose Group. For faster editing, however, use Ctrl + Alt + G on Windows or ChromeOS, or ⌘ + Option + G on Mac.
What Can You Do With Grouped Objects?
Grouping lets you manage several related elements as one unit. This is especially useful for infographics, diagrams, timelines, and other layouts that contain multiple small objects.
1. Move Related Elements Together
After grouping objects, you can move them without changing their arrangement. For example, a grouped infographic including an icon, a number, and a short description can be moved to another part of the slide without repositioning each object separately.
2. Resize and Copy Designs
You can resize, copy, and reposition a group while preserving the relationship between its components. This helps maintain consistent spacing and alignment throughout your presentation.
3. Create Repeated Layouts
Need to repeat a particular design elsewhere? Grouping comes in clutch here too. For example, if an icon-and-label combination appears several times, group the first combination and duplicate it instead of rebuilding the layout from scratch.
How to Edit One Object Inside a Group
Grouping does not mean you lose access to the individual elements. After you group things on Google Slides, you can still make changes to one object without breaking the entire group apart.
To edit an object inside a group on Google Slides:
Step 1: Double-click the group to access its individual elements.
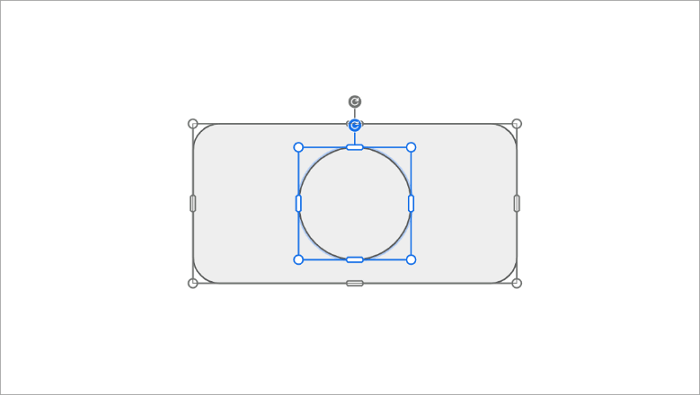
Step 2: Select the specific text box, image, shape, or other element inside the group and make your edit from the top menu.
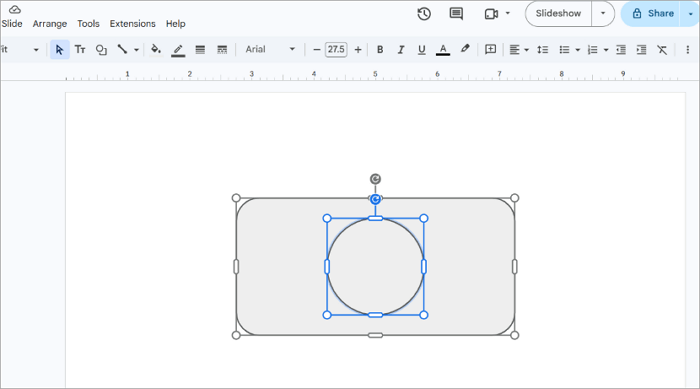
Step 3: Click outside the group when finished.
Editing inside a group is usually the fastest option when you only need to change one object. If you need to move or edit several elements independently, you might want to ungroup them instead.
How to Ungroup Objects in Google Slides
Now that you already know how to group in Google Slides, there may be situations where you need to ungroup them so that the elements can be edited independently. Google Slides lets you do this through the same Arrange menu.
Here’s how to go about it:
Step 1: Select the grouped object in your slide.
Step 2: Open the Arrange menu.
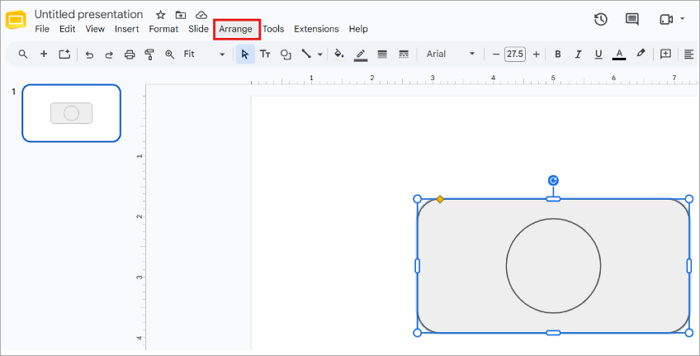
Step 3: Then select Ungroup.
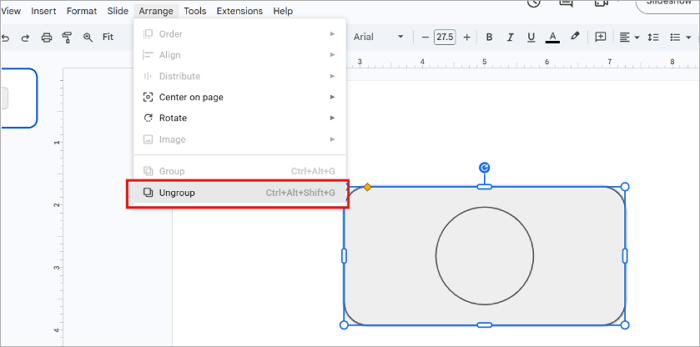
Alternatively, you can quickly right-click the group and select Ungroup from the context menu. For a keyboard shortcut, use Ctrl + Alt + Shift + G on Windows or ChromeOS. On Mac, use ⌘ + Option + Shift + G.
After ungrouping, the elements are separated so that you can select and edit each one independently.
Why Can’t I Group Objects in Google Slides?
If the Group option is grayed out or missing from the Arrange menu and you’re unable to group items in Google Slides, one of these common issues is usually the cause:
1️⃣ Only one object is selected: Grouping needs at least two elements. Hold Shift and click the additional objects you want to include. Make sure each one shows as selected.
2️⃣ Your multi-selection was lost: Your selection can be removed if you click somewhere else on the slide. Select all the required objects again before opening the Arrange menu.
3️⃣ The objects are on different slides: Grouping works with objects on the same slide. Move or copy the elements onto one slide before you group them.
4️⃣ One selected item behaves differently from standard elements: Certain embedded content, like some linked charts, cannot be grouped in Google Slides and may need to be handled separately.
5️⃣ The objects are already grouped: If you select an existing group, you may need to enter the group or ungroup it before changing the individual elements.
Conclusion
Once you group objects, you stop worrying about accidentally nudging one piece out of alignment while adjusting another.
Think of grouping as a way to preserve relationships between objects rather than permanently merging them. The elements remain separate, but they become easier to manage as a design component.
Now that you know how to group in Google Slides, try grouping one multi-element component in your current presentation before continuing with the rest of your slide.
FAQs on Grouping in Google Slides
Users ask a lot of questions about grouping objects in their presentations. Let’s look at the answers to the most common ones.
1. What is the shortcut to group objects in Google Slides?
On Windows and ChromeOS, the shortcut is Ctrl + Alt + G. On Mac, use ⌘ + Option + G. But first, select at least two objects on the slide. Then press the shortcut to turn them into one group.
2. How do I select multiple objects to group in Google Slides?
To select multiple objects for grouping in Google Slides:
- Click one object.
- Hold Shift while clicking each additional object you want to include.
- Alternatively, drag a selection box around multiple objects to select them together.
- After selecting everything you need, use Arrange > Group or the keyboard shortcut.
3. Can I group images and shapes in Google Slides?
Yes, you can group shapes in Google Slides and also add images to the group. For example, you can create a visual component using an image, a shape, and a text box, then group them so they move together. This is useful for diagrams, infographic sections, icons with labels, and other multi-element designs.