Google Slides presentations require careful time management, especially during lessons, workshops, or other timed activities. But you may have already noticed that Google Slides doesn’t have a built-in timer feature.
If you’ve been searching for how to put a timer on Google Slides to manage pacing, keep participants focused, or make sure your presentation stays within schedule, there are several easy workarounds you can use.
Here is a comparison table to help you quickly choose which method fits your needs.
| Method | Best for | Visible timer | Ease of setup |
|---|---|---|---|
| Slide auto-advance | Self-running presentations | No | Easy |
| YouTube countdown timer | Classrooms and activities | Yes | Easy |
| Timer extension or add-on | Frequent presenters | Yes | Moderate |
| Manual timer design | Offline use | Yes | Moderate |
Method 1: Slide Auto-Advance (Built-in Timing)
This slide auto-advance option offers the simplest approach for adding a timer to Google Slides. It is a built-in feature, meaning that it doesn’t require any external tools and works entirely within Google Slides. It works by moving automatically between slides after a set time.
Although this method helps control timing, it doesn’t show a visible countdown. That means you won’t know how much time you have left on a slide, unless you keep track of it yourself. It works best for self-running presentations, kiosk displays, or looping event slides.
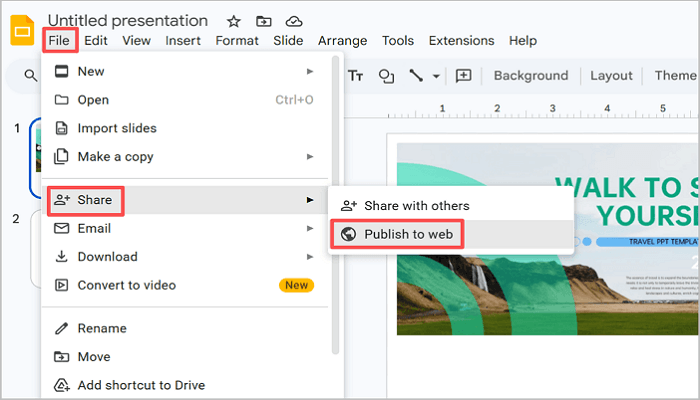
Step 1: Open your presentation and navigate to File > Share > Publish to web.
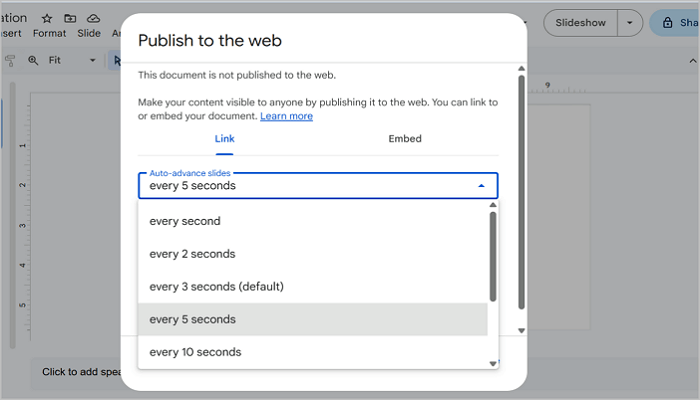
Step 2: Open the Auto-advance slides menu from the prompt that appears and set your preferred time interval.
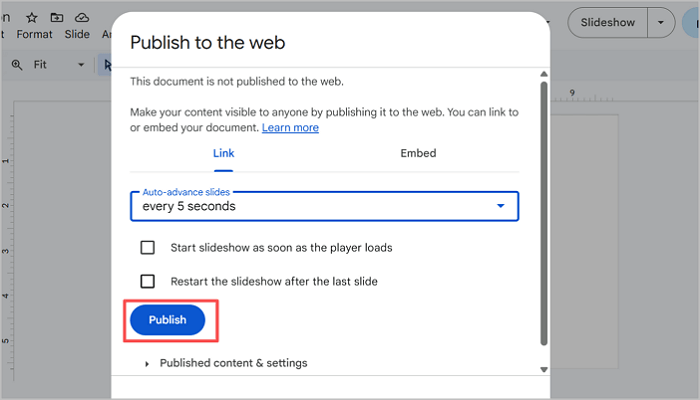
Step 3: Click Publish and start the presentation. Remember to copy the link so you can open it in your browser.
Method 2: Insert a YouTube Countdown Timer (Easiest Visual Method)
If you prefer seeing a visible timer on your slides while presenting, this method will be very helpful. It uses YouTube countdown videos embedded directly into your slides. This method is ideal for quizzes, group activities, or workshops where you need participants to track time visually.
This method is quite popular among presenters because it requires zero setup beyond embedding. However, ensure that you have a stable internet connection before presenting.
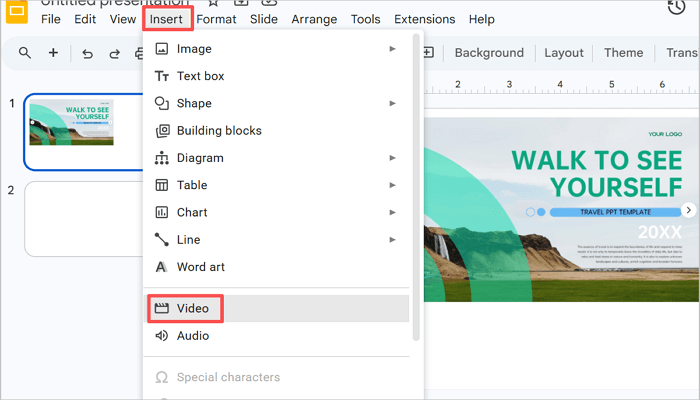
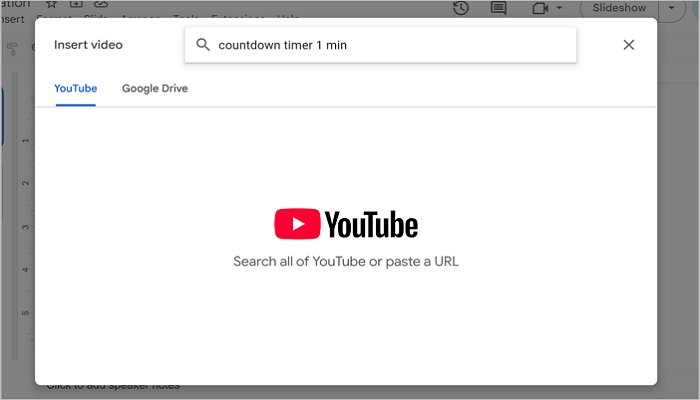
Step 1: Open the slide where you want to add the countdown timer. Then, go to Insert > Video to add the timer video.
Step 2: Type “countdown timer” with your preferred duration into the search box or switch to Google Drive to upload directly.
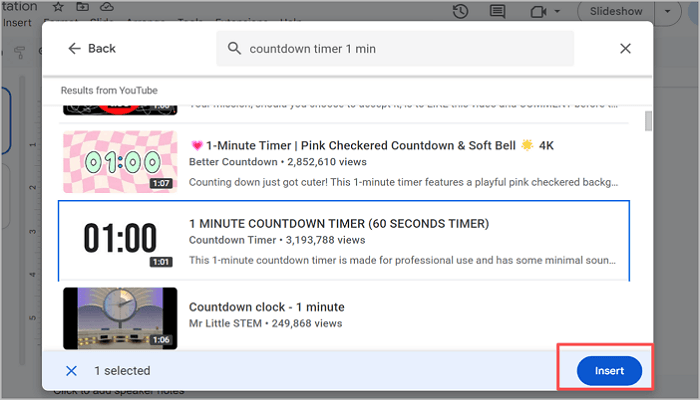
Step 3: Select a video from the results and click Insert to continue.
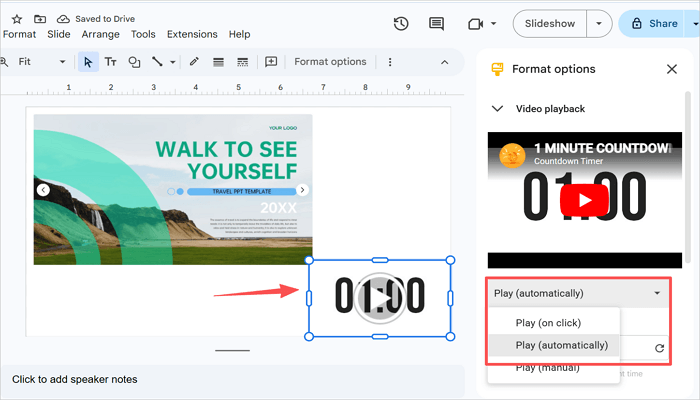
Step 4: Adjust the size and position of the video and modify Video playback to Play (automatically).
Method 3: Use a Timer Extension or Add-on
While the previous methods work well, you can get more control over your Google Slides timer with Chrome extensions or Google Workspace add-ons, and this method will show you how. These tools integrate directly into Google Slides and offer more options, such as custom durations, reusable timers, and a cleaner look overall.
This method is best for longer or professional presentations where you may want to reuse the same timer setup.
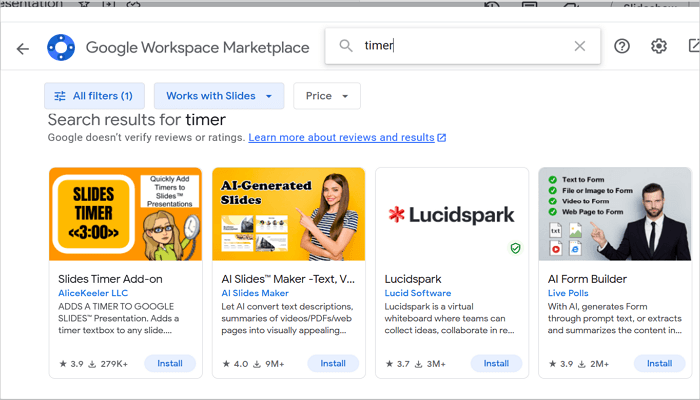
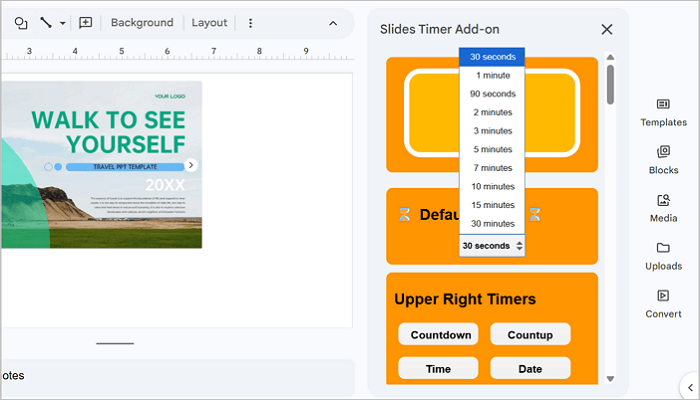
Step 1: Open your presentation in Google Slides and go to Extensions > Add-ons > Get add-ons.

Step 2: Type timer into the search box and click Install on your preferred result to add it to Google Slides.
Step 3: After installing, go to the Extensions tab again and open your add-on timer.

Step 4: From the sidebar, choose your countdown duration and make any further customizations, such as display style or alert options, to the add-on.
Method 4: Create a Timer Manually (Offline Option)
Limited internet access? No problem at all. With this method, you can easily add timers to Google Slides by designing one yourself using shapes, text, and animations.
Although this approach takes more time to set up and may not be as dynamic as a live countdown, it gives you full control over the design and works without any connection or external tools.
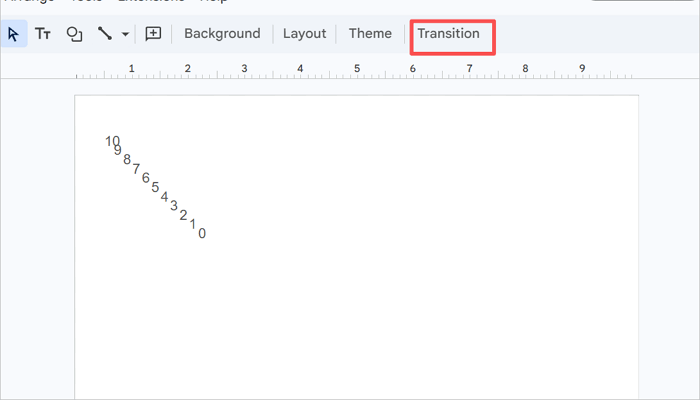
Step 1: Add a text box to your slide via Insert > Text box and type your starting number.

Step 2: Select the text box and press Ctrl + D on your keyboard to duplicate it multiple times, changing each number down to “1” or “0.”

Step 3: Go to Transition to open the Motion side panel.
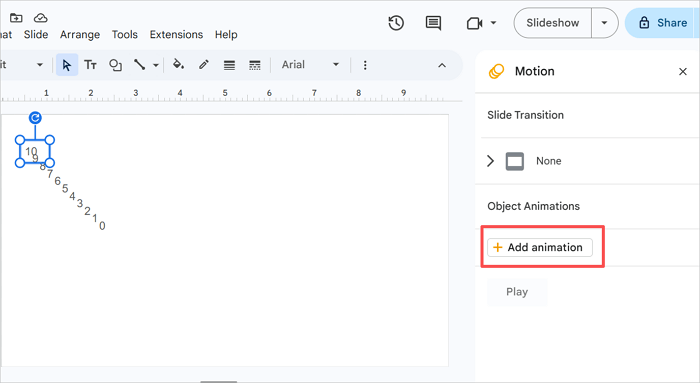
Step 4: Select the first text box in the order you want them to appear (10) and click Add animation.
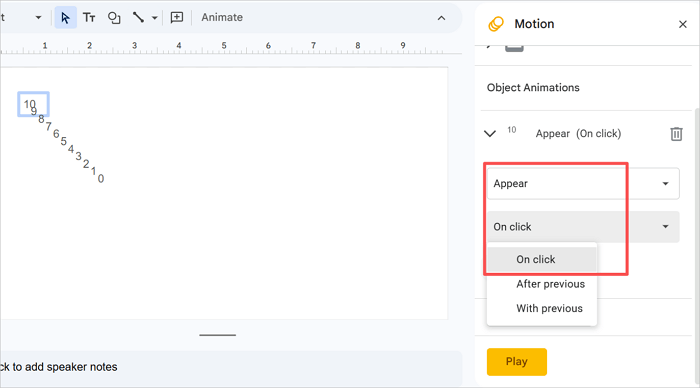
Step 5: Change the settings to Appear On click. Add animations to other text boxes on the slide with the After previous setting.
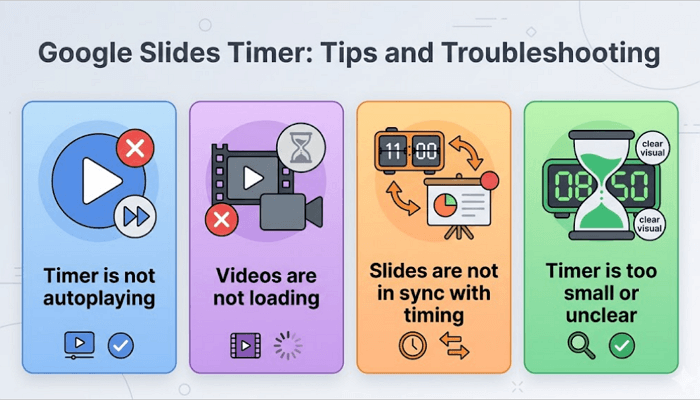
Google Slides Timer: Tips and Troubleshooting
It’s normal to encounter some issues when you insert a timer into Google Slides. What is important, however, is how you resolve it so that your slides still look professional. Here are some common timer problems and quick fixes.
1. Timer is not autoplaying
Check the “Autoplay when presenting” box in the Format options panel. Also, confirm that your browser isn’t blocking autoplay. Google Chrome is the most reliable browser option to avoid this.
2. Videos are not loading
Confirm that you have a stable internet connection or switch to a different YouTube video link. Alternatively, you can upload a timer video file to Google Drive and insert it from there.
3. Slides are not in sync with the timing
Recheck the auto-advance settings in Google Slides to confirm that you have the right timing.
4. Timer is too small or unclear
Simply resize the countdown video on your slide or go into full-screen mode.
To avoid these issues taking you by surprise while presenting, always do a full run-through in presentation mode before going live.
Conclusion
A countdown timer on Google Slides is more than just a simple feature. It helps control pacing, keep your audience engaged, and reduce stress during presentations.
Now that you know how to put a timer on Google Slides, your presentation goal determines the best approach to use. You can either allow your audience to see the timer or simply let it provide more control in your presentation.
Whichever method you choose, always remember to test it in presentation mode before the real session.
More About Timer for Google Slides
The methods above cover popular scenarios, but a few specific situations come up often. Here are some quick answers to common questions about using timers in Google Slides.
1. Can you add a timer to Google Slides without YouTube?
Yes, you can add a timer for Google Slides without linking to a YouTube video. A reliable way to achieve this is by using extensions or add-ons within Google Slides.
Here’s how to go about it:
- Go to Extensions > Add-ons in Google Slides.
- Search and install your preferred timer app.
- Insert the time onto your slide.
- Adjust duration and display settings in the sidebar.
2. How to time slides on Google Slides without publishing?
To time slides on Google Slides without publishing:
- Select the first slide in your presentation and open the Transition bar.
- From the side panel that opens, choose a transition option.
- Use the toggle option to select an auto-advance duration.
- Click Apply to all slides.
3. How to put a timer on Google Slides on an iPad?
Google Slides for iPad won’t allow you to use Chrome extensions, but you can still insert timers with a YouTube countdown video. Here’s how to do it:
- Open your presentation.
- Tap Insert > video.
- Search for a countdown timer.
- Embed it on your slide.
To enable autoplay, you may need to configure this through the web version of Google Slides in a mobile browser.