Have you tried to wrap text in PPT the same way you do in Microsoft Word? If yes, you might already understand how frustrating that can be.
Unlike Word, which is built around continuous document flow, PowerPoint is slide-based. This means that every element, such as text, images, or shapes, must be positioned manually because PowerPoint has no automatic text wrapping feature.
Whether you are working with photos, icons, shapes, or infographics, this guide walks you through three practical methods for wrapping text in PowerPoint.
Key Takeaways
- PowerPoint does not support automatic text wrapping like Microsoft Word.
- You can simulate text wrapping by arranging multiple text boxes manually around images or shapes.
- Microsoft Word can be used as a workaround for true wrapping behavior.
Does PowerPoint Support Text Wrapping?
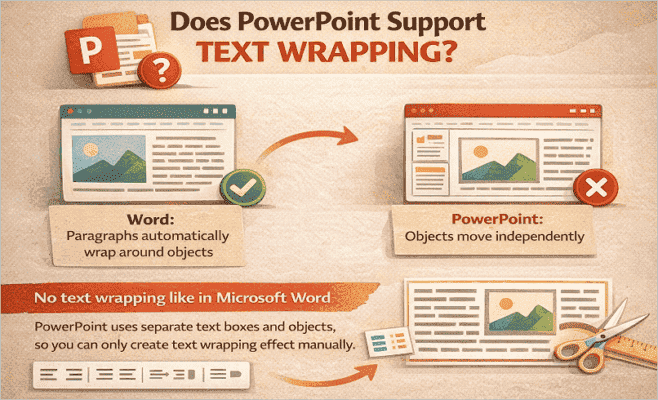
At the moment, PowerPoint does not support text wrapping the same way Microsoft Word does. In Word, paragraphs automatically flow around images and objects because Word was designed as a document editor.
However, PowerPoint works differently because slides are built using separate elements such as text boxes, images, charts, and shapes. Each object moves independently on the slide. As a result of this limitation, you can only create the same visual wrapping effect manually by combining multiple text boxes, careful spacing, and alignment tools in PowerPoint.
1. How to Wrap Text Around Images in PowerPoint (Manual Method)
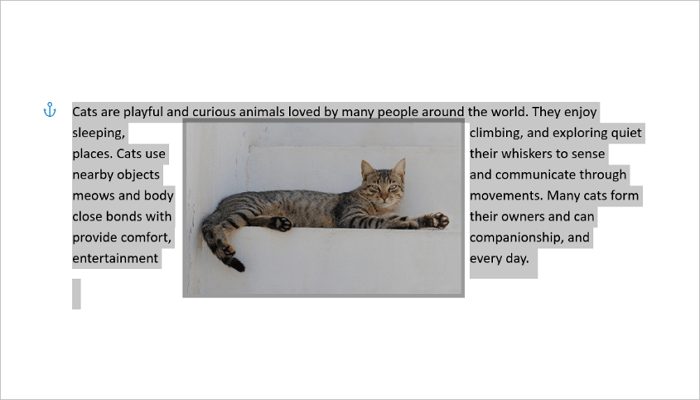
This is the method most users search for when they want to wrap text around a picture in PowerPoint. It comes in handy when you need to place text beside a photo, logo, screenshot, or illustration, without making the slide feel too crowded.
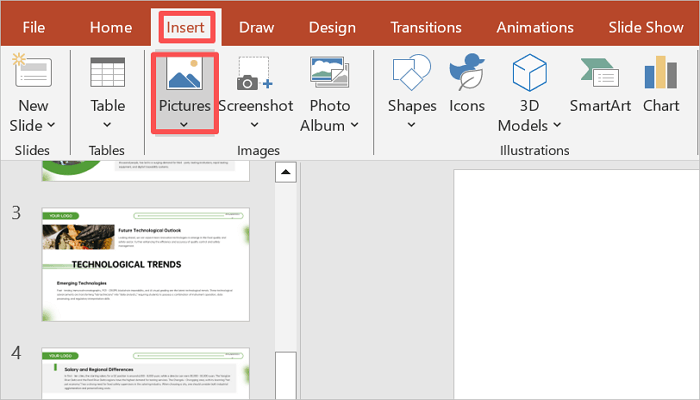
Step 1: Insert the image into the slide
Go to Insert > Pictures and place your image on the slide. It is important to position the image first because it becomes the anchor of your layout.
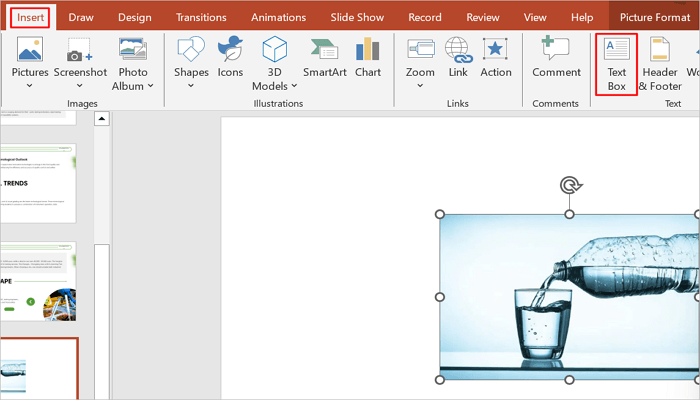
Step 2: Add text boxes to create a wrap
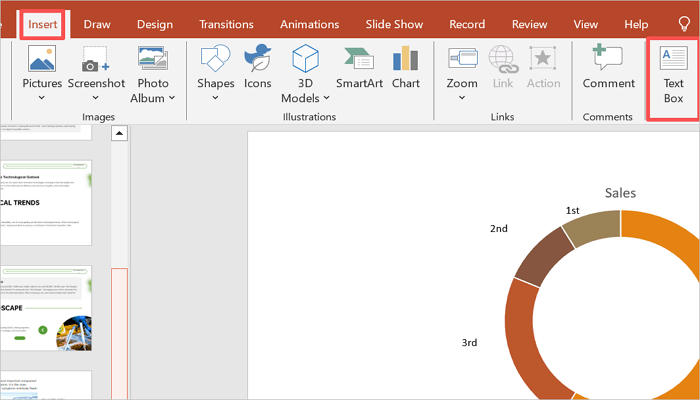
Insert multiple text boxes around the image via Insert > Text box, and draw the text box. Then, type or paste your content into each text box.
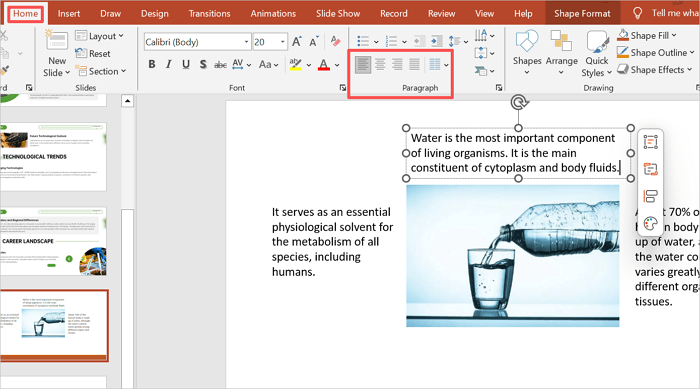
Step 3: Align text boxes
Select all your text boxes and use Home > Paragraph > Align to align them consistently. Check that the text boxes do not overlap the image by zooming in.
2. How to Wrap Text in PowerPoint Shapes or Objects
When working with timelines, infographics, or icons, you may need to create PPT text wrap around shapes instead of regular images. While this approach is similar to image wrapping, shapes usually create stricter layout boundaries, which makes spacing even more important.
Step 1: Add the shape or object
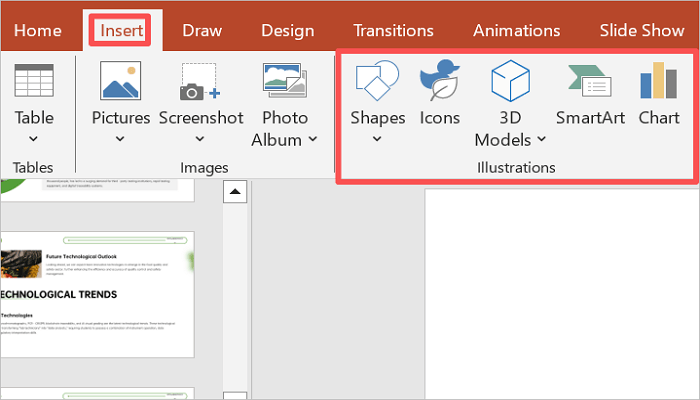
Click Insert > Illustrations and select your desired shape, icon, or infographic. Draw it on the slide, resize it, and position it where you want.
Step 2: Insert text boxes
Go to Insert > Text box to add separate text boxes around the shape. This creates a cleaner appearance on the slide.
Step 3: Add and align content
Type your content and drag each of the text boxes to align them properly with the shape’s edges.
3. Advanced Method: Using Word to Wrap Text in PowerPoint
Sometimes, the manual text box workaround in PowerPoint may not give you the true text wrapping effect you need in a presentation. This is where Microsoft Word becomes helpful, because it supports genuine text wrapping, allowing paragraphs to flow naturally around images.
The tradeoff with this approach is that editing becomes less flexible after pasting wrapped text from Microsoft Word into PowerPoint.
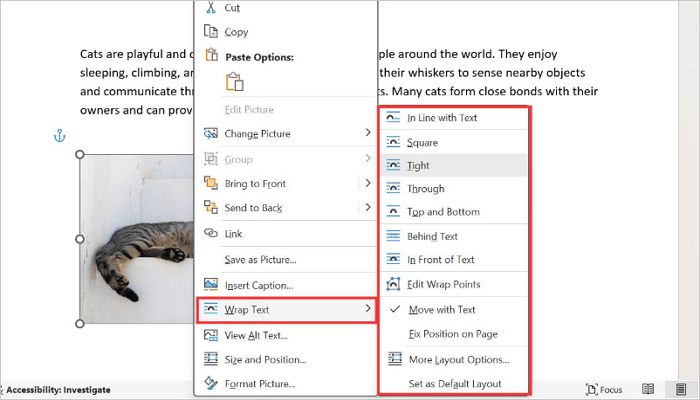
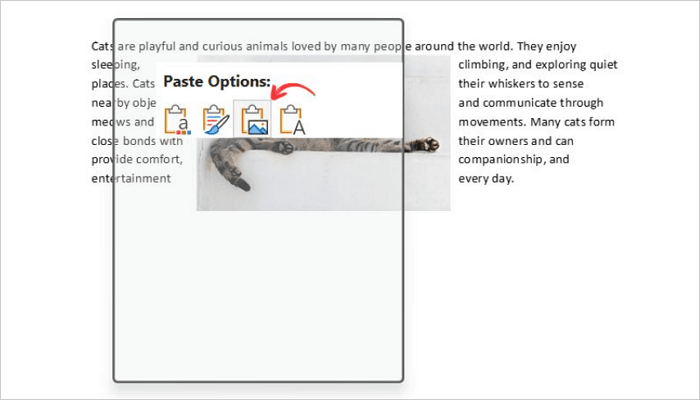
Step 1: Upload images and enable wrap
Go to Insert > Pictures to upload your image. Then, right-click on the inserted image, select Wrap Text, and choose your preferred wrapping style.
Step 2: Copy the wrapped text and image
Move the image onto the text and reposition it to your desired look. Then, select and copy the wrapped text using Ctrl + A and Ctrl + C.
Step 3: Paste the text into PowerPoint
Switch back to PowerPoint, right-click the slide, and paste the wrapped text as an image.
Common Problems When You Wrap Text in PPT
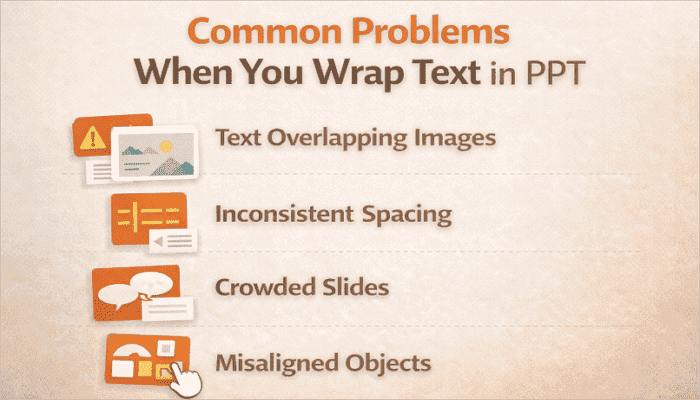
Even after learning how to wrap text in PowerPoint with any of these methods, you may still run into layout issues. Here are the most common ones, why they happen, and how to fix them.
- Text overlapping images: This happens when the text box is too large or too close to the image. Reduce the size and increase spacing around the image.
- Inconsistent spacing: You probably positioned each text box by eye. Use alignment guides to distribute text boxes evenly.
- Crowded slides: Too much content is being forced around a large image. Shorten paragraphs, reduce font size, or resize the image to create more white space.
- Misaligned objects: Objects move independently when they are not grouped. Select all related elements and use Home > Arrange > Group to lock their positions.
Conclusion
Knowing how to wrap text in PPT helps you create cleaner and more professional presentations, even without a native text wrapping feature. In most cases, strong slide layouts depend more on spacing, alignment, and visual balance than on built-in software features.
Before using any of these techniques in an important presentation, practice with different text box arrangements on a sample slide. This helps you discover what works best for your content early.
Learn More About PPT Text Wrap
Now that you understand the basics, here are answers to common questions about “PowerPoint wrap text around image”.
1. How to wrap text around a picture in PowerPoint?
To wrap text around a picture in PowerPoint:
- Insert your picture via Insert > Pictures.
- Click Insert > Text Box and draw a text box to the left or right of the picture.
- Add a second text box below the picture.
- Use PowerPoint’s alignment guides and Arrange > Align to keep spacing consistent.
- Group all elements by selecting them and going to Arrange > Group.
2. How to wrap text in a PowerPoint text box?
Here’s how to wrap text in a PowerPoint text box:
- Insert a text box from the Insert menu.
- Right-click the text box and select Format Shape.
- In the Format Shape pane, click Text Options > Text Box.
- Enable Wrap text in shape.
- Resize the text box to improve readability.
3. How to wrap text in a PPT table?
By default, text inside a PowerPoint table cell wraps automatically based on the cell width. If it is not wrapping:
- Click inside the table cell where the text is overflowing.
- Go to Table Tools > Layout and check the cell width.
- Adjust cell size manually.
- Reduce font size or widen columns if text becomes crowded.