Curved arrows can serve several purposes in a presentation. They help show direction, connect related ideas, illustrate loops and repeated processes, or suggest movement between two points that aren’t in a straight line. You may need curved arrows in PPT to make the direction of information easier for your audience to understand.
In PowerPoint, you can create these curved arrows using shapes and drawing tools, and this guide walks you through the different methods so you can choose the right one for your needs.
Key Takeaways
- Use a preset curved arrow for the quickest result.
- Use an Arc for a thin, flexible arrow.
- Combine shapes when you need a custom design.
- Use SmartArt for arrow-based processes and cycles.
How to Make Curved Arrows in PowerPoint by Inserting Shapes
As mentioned, you can create curved arrows in PowerPoint in different ways, and the best option depends on whether you prioritize speed, control, or a balance of both.
Method 1: Use a Curved Arrow Shape
The built-in Block Arrows option remains the easiest way to make curved arrows in PowerPoint. It works particularly well when the available preset already looks close to what you need in your PowerPoint presentation.
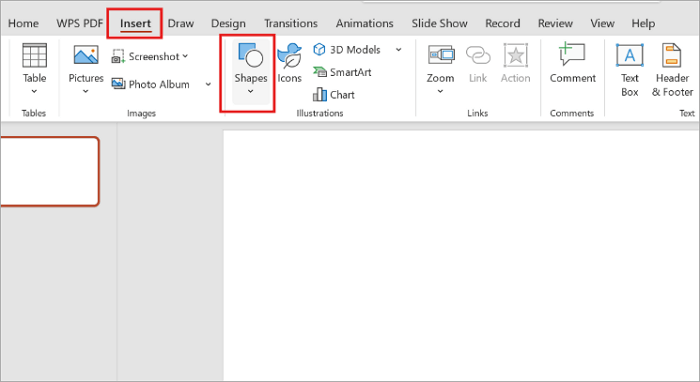
Step 1: Open your PowerPoint slide and go to Insert > Shapes.
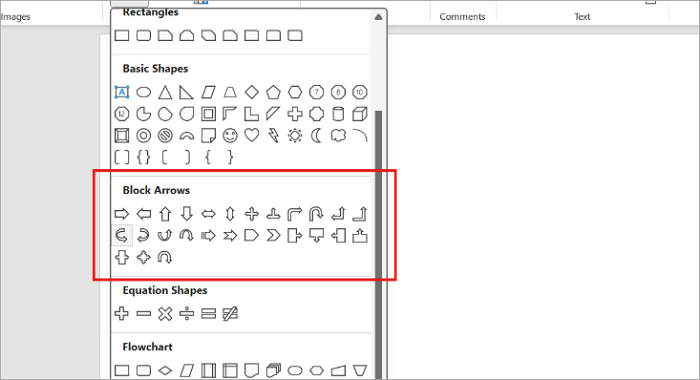
Step 2: In the Shapes gallery, find the Block Arrows section and select a curved arrow shape.
Step 3: Click and drag on the slide to create the arrow.

Step 4: Select the arrow and drag its yellow handles to adjust the curve, thickness, or proportions. Use the white sizing handles to make the arrow larger or smaller. You can also use the rotation handle to change its direction.

Method 2: Create a Curved Arrow With an Arc
Want a more flexible curved arrow rather than a block shape? An Arc is a useful option. You can use it to create thin curved lines that work well for diagrams, annotations, and process slides.
Step 1: Go to Insert > Shapes and select Arc.
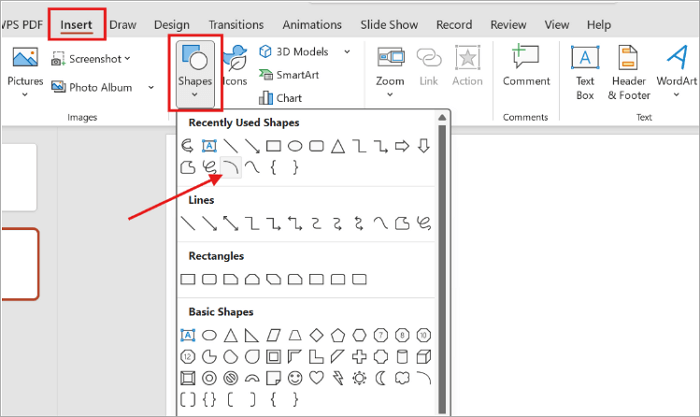
Step 2: Click and drag across the slide while holding the Shift key. This helps you create a more controlled arc.

Step 3: Select the Arc and drag its yellow adjustment handles to adjust its shape.
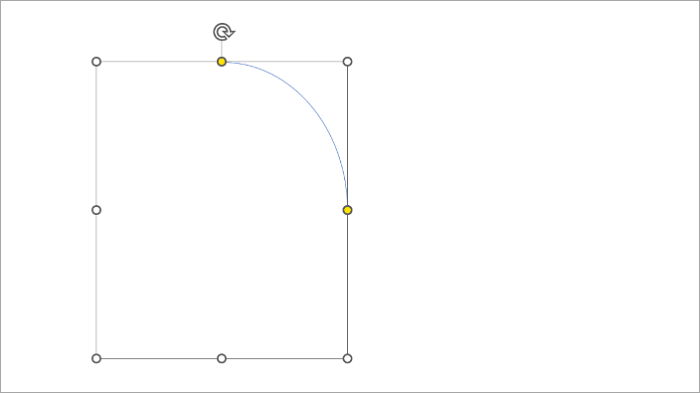
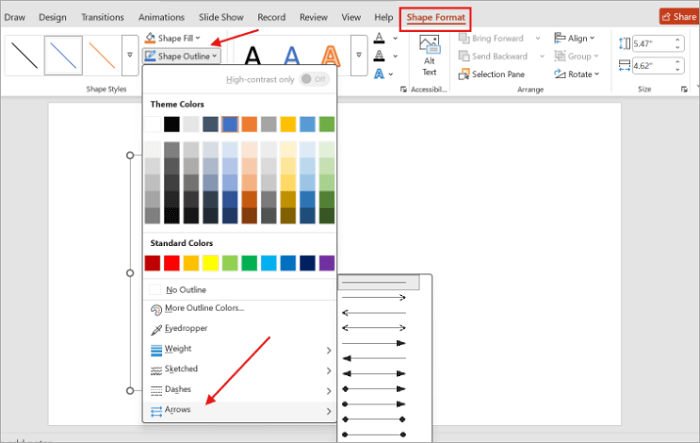
Step 4: With the Arc selected, go to Shape Format > Shape Outline > Arrows and choose an arrowhead style. You can also adjust the line weight from the Shape Outline menu.
Method 3: Build a Custom Curved Arrow With Shapes
Sometimes the standard shapes do not give you the curve or proportions you want. In that case, you can combine shapes to build your own arrow.
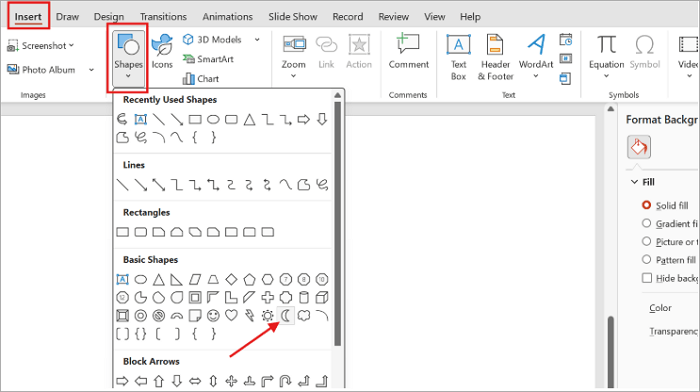
Step 1: Open Insert > Shapes in PowerPoint and select a Moon or Block Arc shape. Draw the shape on the slide and adjust its yellow handles until you get the curve you want.
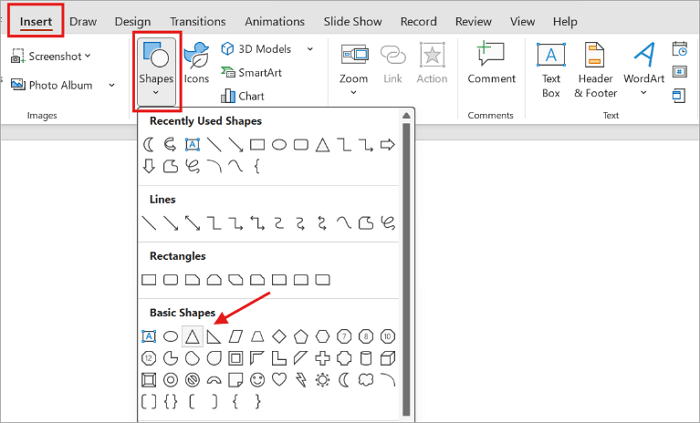
Step 2: Return to the Shapes menu and insert a Triangle. Resize and rotate it so that it fits neatly at the end of the curved shape.
Step 3: Hold Shift and select both objects. You can group them if you want to move and resize them together while keeping the original shapes separate.

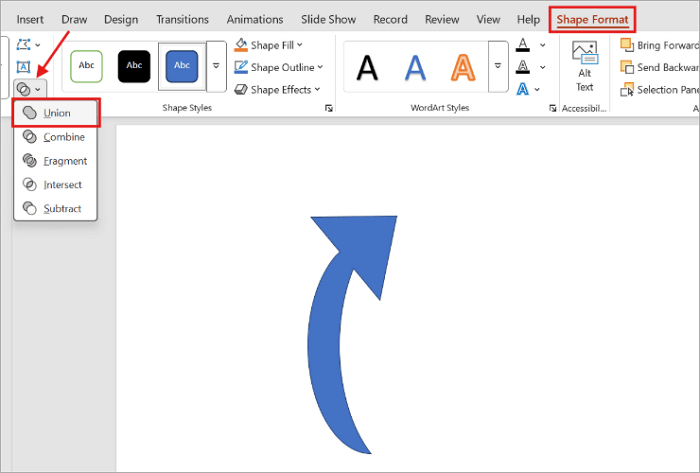
Step 4: For a single editable shape, go to Shape Format > Merge Shapes > Union. PowerPoint combines the selected objects into one shape.
How to Create an Arrow Diagram with SmartArt
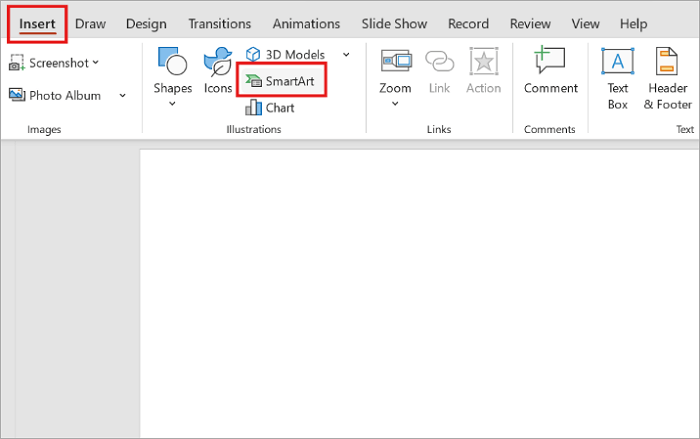
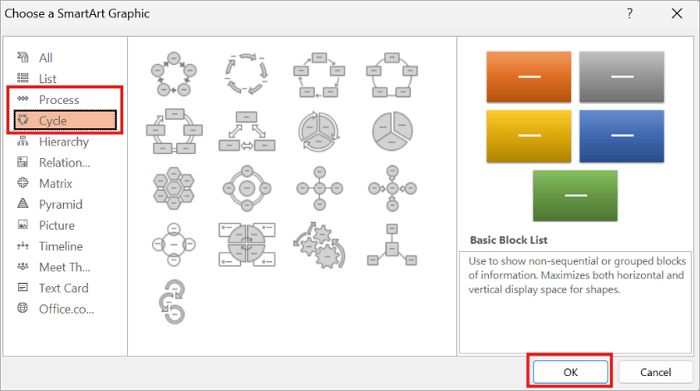
If your goal is to show several connected steps rather than one arrow, such as a circular arrow PowerPoint process, SmartArt can save you time. SmartArt includes Process and Cycle layouts designed to show progression, relationships, and repeated sequences.
Step 1: Open PowerPoint and go to Insert > SmartArt.
Step 2: Choose Process or Cycle from the SmartArt gallery. Select a layout that uses arrows or circular movement, then click OK.
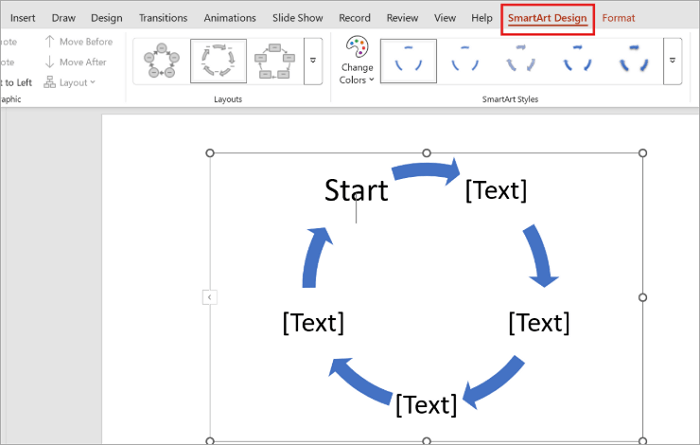
Step 3: Enter your text in the Text pane or directly inside the SmartArt shapes.

Step 4: Use the SmartArt Design tab to change the layout, colors, and styles afterward.
Tips for Using Arrows Effectively in PowerPoint
Now that you know how to put arrows in PowerPoint, you’ll find these guidelines helpful for keeping them clear and effective in your presentations:
✨ Make the direction obvious: Position each arrow so viewers can immediately understand where to look next.
✨ Keep the style consistent: When using multiple arrows, apply the same line weight, fill color, and arrowhead style throughout the slide.
✨ Protect important content: Avoid placing arrows across key text, labels, or graphics. Leave enough space around each arrowhead so it does not appear cramped.
✨ Separate multiple arrows: Use different positions, spacing, or gentle curves instead of stacking several arrows on top of one another.
✨ Review the slide: Check the slide in presentation view before presenting. An arrow that looks clear while editing may become harder to see when the entire slide is displayed.
Conclusion
Curved arrows in PPT are useful when you need to show direction, movement, or relationships without adding more text to a slide.
To know if a curved arrow is effective in your presentation, look at the slide with the text hidden and see if the visual flow still makes sense on its own. If it doesn’t, you may need to modify the curve, angle, or thickness.
Ready to begin? Start with a preset arrow for simple designs, then use an Arc or custom shape when the curve needs more adjustment.
FAQs on Curved Arrows in PPT
Here are quick answers to common questions users ask about making curved arrows in PowerPoint.
1. How to add arrows in PowerPoint?
Here’s how to put arrows in PowerPoint quickly:
- Open your PowerPoint slide and go to Insert > Shapes.
- Choose an Arrow from the Lines or Block Arrows section.
- Click and drag on the slide to draw the arrow.
- Select the arrow to resize, rotate, or change its color and outline.
- You can also use Shape Format to adjust its appearance.
2. How to draw a bowed wafer in PPT?
To draw a bowed wafer in PPT:
- Open your presentation.
- Go to Insert > Shapes > Arc, then drag across the slide.
- Use the yellow handles to adjust the curve.
- Finally, choose Shape Format > Shape Outline > Arrows to add an arrowhead to the end.
3. How do I create a 90-degree arrow in PowerPoint?
To quickly create a 90-degree arrow:
- Go to Insert > Shapes.
- Choose a suitable arrow or elbow connector from the Lines section.
- Draw it on the slide, then adjust its size and direction.
- Go to Shape Format > Shape Outline > Arrows to insert an arrowhead so the line maintains a clear right-angle turn.