Do you wonder why your classmates or colleagues at work aren’t catching up with the key points in your presentation? Most times, the problem isn’t your content, but the way you design the slides.
When images are too bold, they can overpower the text and make important information difficult to read. Knowing how to make an image transparent in Google Slides helps fix this issue.
By adjusting transparency, you can soften images, improve text readability, create subtle backgrounds, and also blend multiple visuals in your presentation.
How to Make an Image Transparent in Google Slides
Before adjusting image transparency in your slides, it’s important to understand how the transparency slider works in Google Slides.
When it’s at 0%, the image appears fully solid and becomes more see-through (transparent) as you increase the percentage. Note that this is different from brightness or background removal, as it doesn’t erase any part of your image—it simply reduces opacity.
For example, you might want to place your company photo or logo behind a slide title. Instead of covering the text, you can reduce the opacity so the image becomes a subtle background.
💡 Now, here’s how to make an image transparent on Google Slides:
Step 1: Open Google Slides
Go to Google Slides and open the presentation you want to work on.
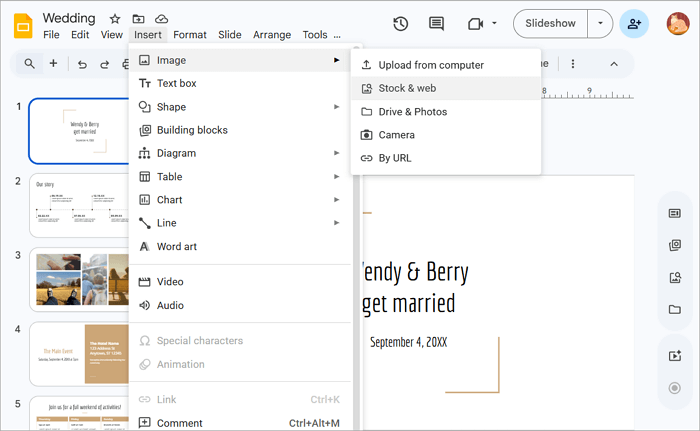
Step 2: Select and Insert the Image
It’s time to insert your image. Go to Insert > Image and choose a desired upload option.
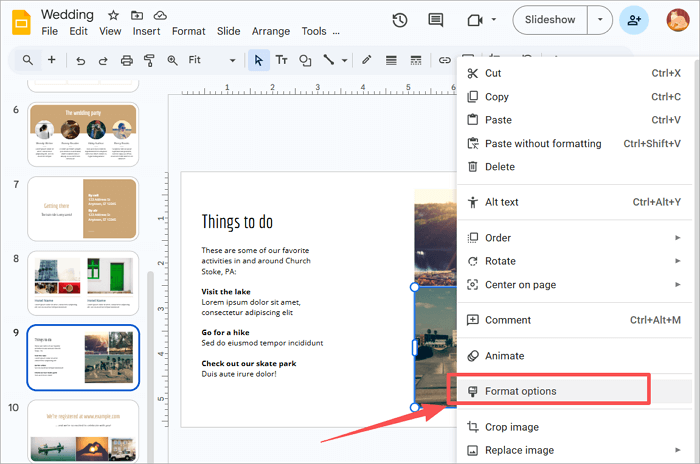
Step 3: Open Format Options
With the image selected, right-click on it and go to Format Options from the context menu.
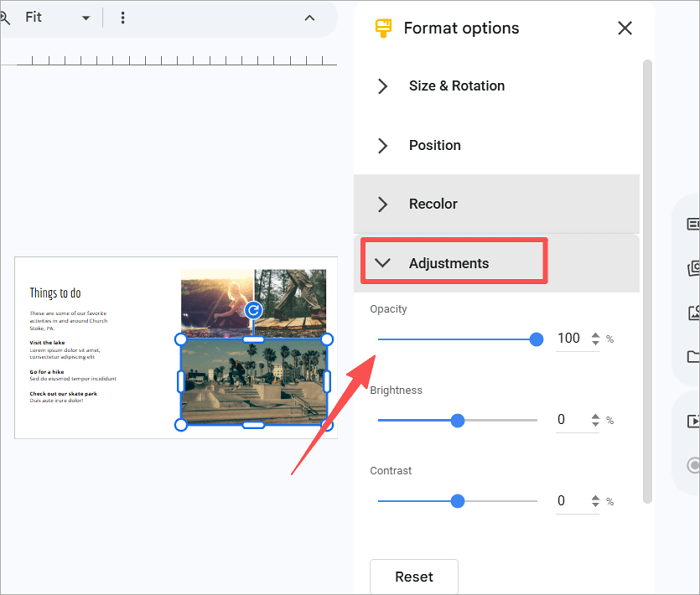
Step 4: Open Adjustments Settings
A control panel will open on the right side of the screen. Click on Adjustments to expand the settings.
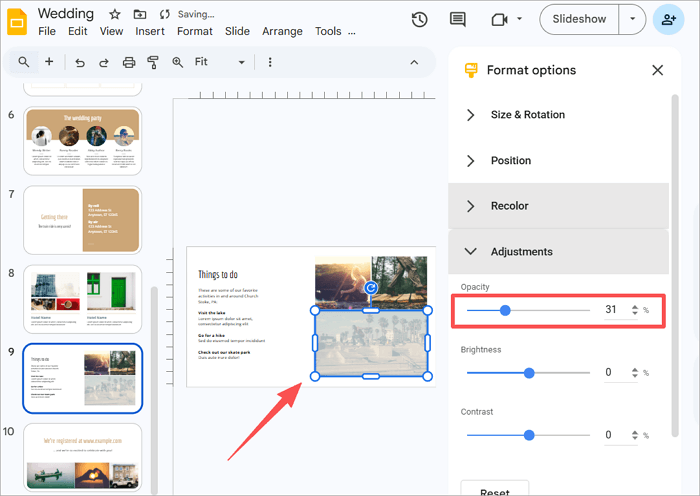
Step 5: Adjust Transparency
Move the Opacity slider to the left to increase the transparency of the image.
How to Apply Gradients to an Image on Google Slides
You want to enhance the image transparency of Google Slides without changing the image itself?
That’s where gradient overlays come in handy, allowing you to darken the bottom part of a photo so white text becomes easier to read, or fade one side of an image so it blends smoothly with the rest of your slide.
💡 See how to apply a gradient overlay in Google Slides:
Step 1: Open your presentation and proceed to Insert > Shape > Shapes to add a rectangle.
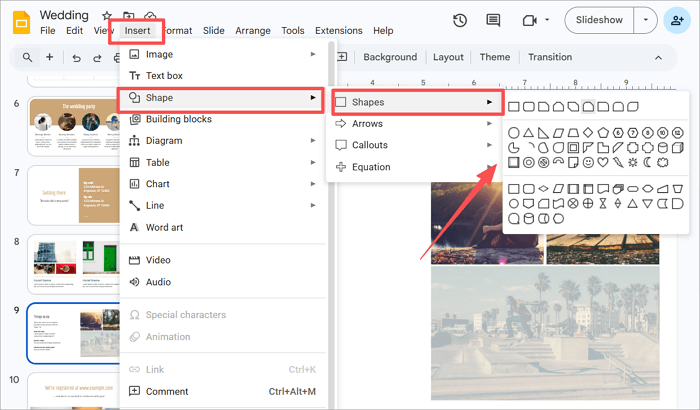
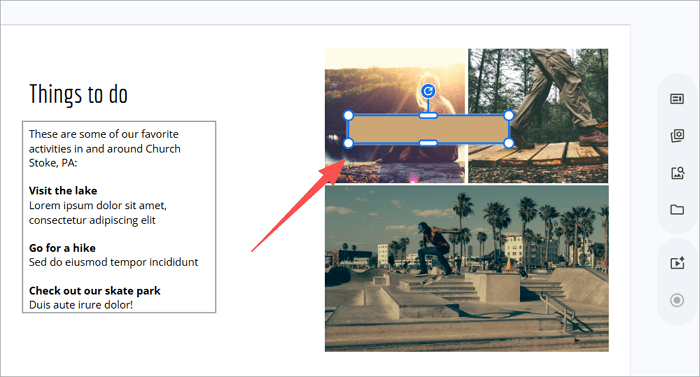
Step 2: Draw the rectangle over the image in your slide.
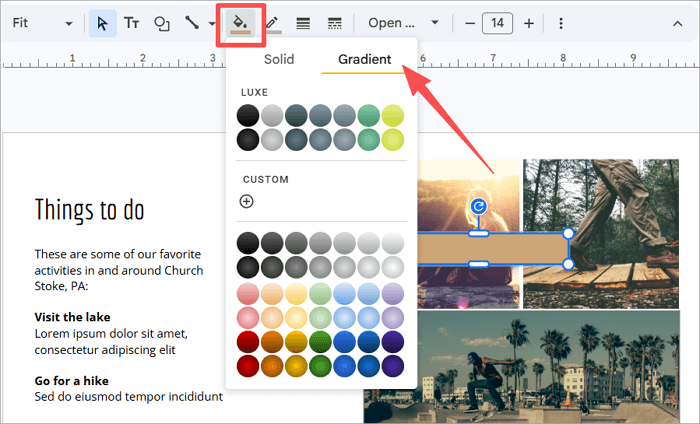
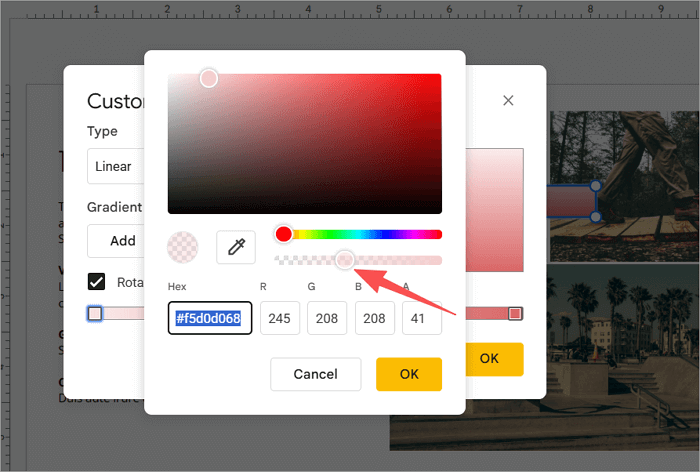
Step 3: Select the rectangle, click on the Fill color tool, and choose Gradient. Then, click on the + icon to add a custom gradient.
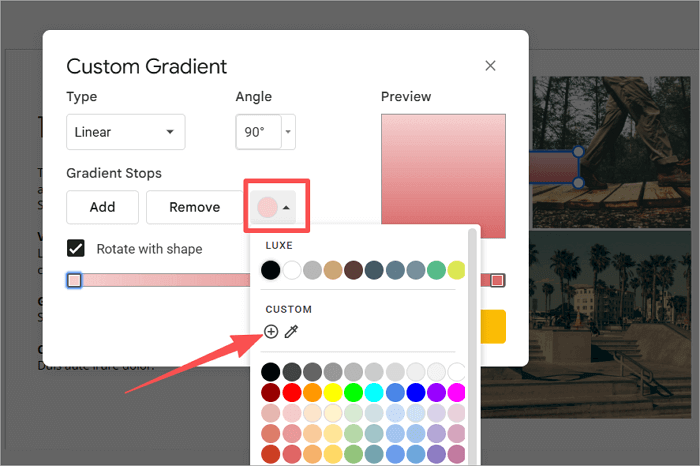
Step 4: Open the Gradient stop color dropdown and tap the + icon once again.
Step 5: Drag the slider to adjust the transparency of the gradient overlay on your image, and vice versa. Then click OK to apply the setting.
How to Make Shapes Transparent on Google Slides
Sometimes, shapes are used to highlight text and make it easier to read, or to create subtle background layers for section headers in presentations.
Let’s explore the different ways to go about it:
1. Custom Shape Transparency
You can adjust a shape’s fill transparency to make text easier to read over images or to subtly highlight key information on a slide. This option comes in handy when creating marketing presentations.
Step 1: Go to Insert > Shape > Shapes and select a rectangle.
Step 2: Draw the shape over the portion of the slide you want to make transparent.
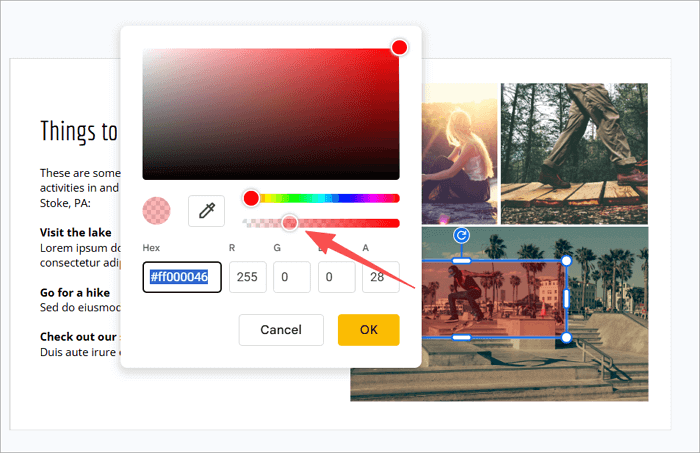
Step 3: Proceed to the Fill color tool and select the + icon to add a custom color.
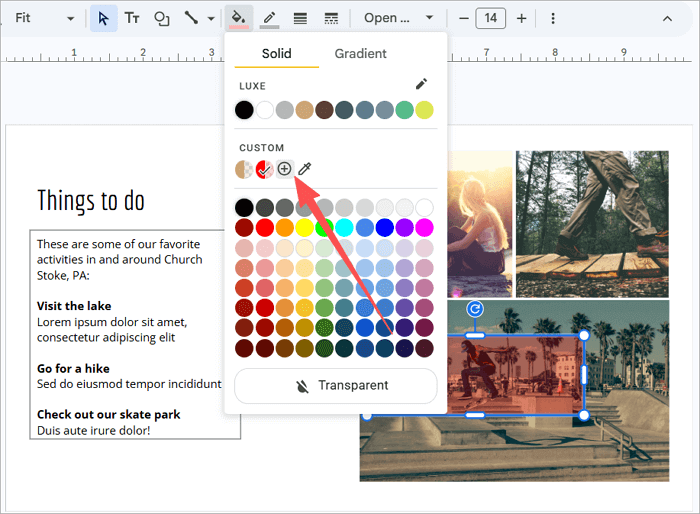
Step 4: Drag the slider to the left to increase the transparency and click OK.
2. Make Shape Completely Transparent
You may want to remove all visible fill from a shape while keeping it on the slide. This is where full transparency comes in handy.
This option is useful when you need to create invisible click zones or empty frames to improve the slide layout.
Step 1: Select the shape you want to make fully transparent.
Step 2: Proceed to fill color and click on Transparent.

The shape will remain on the slide but will no longer display any color, as shown here.
How to Make a Background Transparent in Google Slides
Although Google Slides doesn’t have a dedicated option to make backgrounds transparent, there are ways to bypass this limitation.
One option is creating transparent PNGs from external sources such as Adobe or Canva, and using them as background images in Google Slides. Or you can also adjust the transparency of the background color of the slides.
💡 Here’s how to do it:
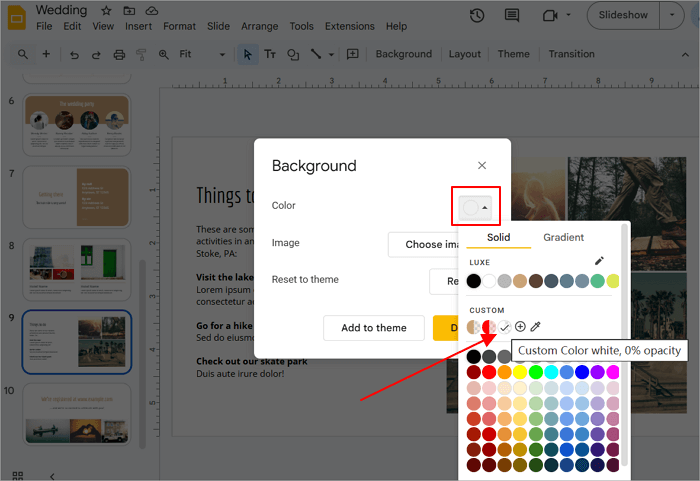
Step 1: Go to your slide and right-click on it from the slides pane. Then, select Change background.
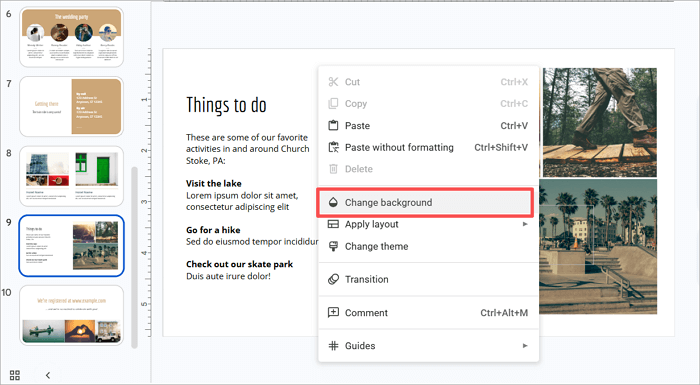
Step 2: Proceed to the Fill color option, add a custom color, and use the slider to create transparency.
Troubleshooting Transparency Issues in Google Slides
Now that you know how to make a picture transparent on Google Slides, don’t be surprised if you run into a few hiccups in the process. Let’s check out common image transparency issues and how to fix them quickly.
| Problem | Solution |
| 1. Transparency slider not visible | Click on Adjustments in the Format Options pane to expand the section and reveal the slider |
| 2. Images appear washed out | Reset the Brightness to 0 and use only the Transparency (Opacity) slider |
| 3. Text is hard to read | Add a semi-transparent shape overlay behind the text to boost contrast |
| 4. The shape won’t go fully transparent | Use Format Options > Fill > Transparent, or access Custom color to set full opacity to 0 |
Conclusion
Your slide design game becomes much better when you know how to make an image transparent in Google Slides.
Try experimenting with gradient-filled shapes to create emphasis without cluttering your slides. With this, you’ll be able to direct your audience’s eye and present data more clearly or create professional marketing decks.
Aside from the Opacity (Transparency) slider, Google Slides offers many other tools you can use. Explore these tools to understand how they work or to prepare a set of transparent images for future slides.
FAQs About Image Transparency in Google Slides
Do you want to know more about image transparency in Google Slides? The answer below addresses the most common questions users ask on the topic.
1. How to Make See-Through Images in Slideshows?
You want to make an image transparent in your slideshow? Follow these steps:
- Open your slideshow.
- Insert or click on the image to select it.
- Right-click on it and go to Format Options.
- Click Adjustments to expand the menu.
- Drag the Opacity slider until the image becomes see-through.
2. How to make a photo transparent on Google Slideson a phone/iPad?
Unlike the desktop version, Google Slides for mobile does not offer the Transparency (Opacity) slider option due to its limited formatting tools.
As a result, you won’t find the tool on mobile apps for iOS or Android. However, there’s a simple way around this:
- Open Google Slides in a mobile browser (not the app).
- Request the Desktop site from your browser settings.
- Select the image and go to Format Options.
- Open Adjustments and drag the Transparency slider.
3. How to Remove an Image Background in Google Slides?
To remove an image background in Google Slides, you may need to replace it with a different image or fill it with a color.
- Go to the slide where you want to remove its background.
- Right-click on it from the slide pane.
- Select Change background.
- Fill the existing background with a contrasting color or simply replace it with another image.