Whether you create presentations for school or work, one skill that will prove useful quite frequently is knowing how to edit background graphics in PowerPoint.
You’ll come across situations where you need to remove logos, customize templates, update branding, or change unwanted design elements. However, some of these background elements are controlled differently from normal slide objects, which can make them difficult to edit.
This guide walks you through three practical methods for editing background graphics in PowerPoint—and different formatting options you can use for backgrounds.
💡 Key Takeaways:
- The Slide Master controls most of the background graphics in PowerPoint.
- Editing Slide Master elements can affect multiple slides at once.
- You can customize individual slides without changing the entire presentation.
- PowerPoint offers several formatting options for customizing slides.
Understanding Background Graphics in PowerPoint
Before making any changes to your slides, you should understand what background graphics are and why they behave differently from regular slide objects.
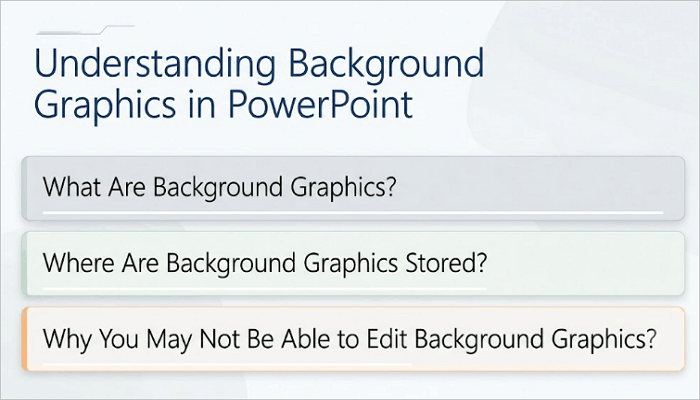
1. What Are Background Graphics?
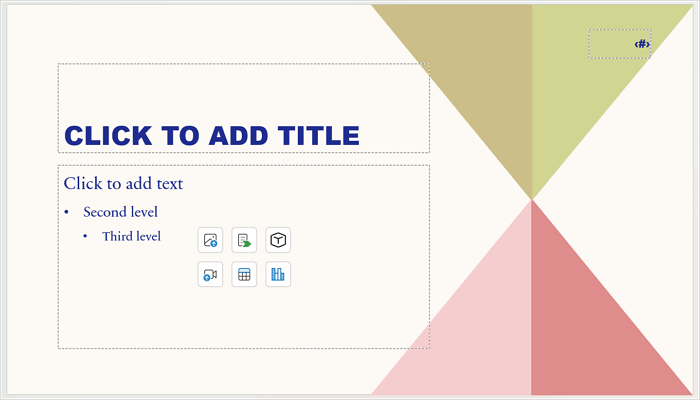
Background graphics are visual elements that sit behind your slide content. They may include logos, watermarks, decorative shapes, or borders used in branded templates.
A background graphic is different from a normal slide background because it is an actual object and may appear across multiple slides.
2. Where Are Background Graphics Stored?
You’ll usually find background graphics in the Slide Master, which basically is the blueprint for your presentation. It controls layouts, fonts, colors, and recurring visual elements. This is why background graphics automatically appear on slides using a corresponding layout.
3. Why You May Not Be Able to Edit Background Graphics?
If you’re unable to select or delete a graphic directly on a slide, it is likely stored in the Slide Master. This explains why some logos and design elements seem locked.
To modify these graphics, you’ll need to access the Slide Master, which we’ll cover next.
1. Edit PowerPoint Background Graphics in the Slide Master
The Slide Master is the most important location for editing background graphics in PowerPoint. It is especially useful when you need to edit a logo, watermark, or decorative element that appears across multiple slides, ensuring consistent changes throughout the presentation.
This is why changes made in the Slide Master can sometimes affect multiple slides at once.
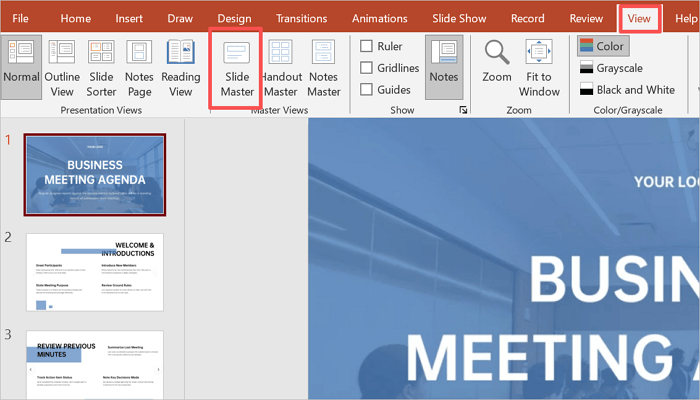
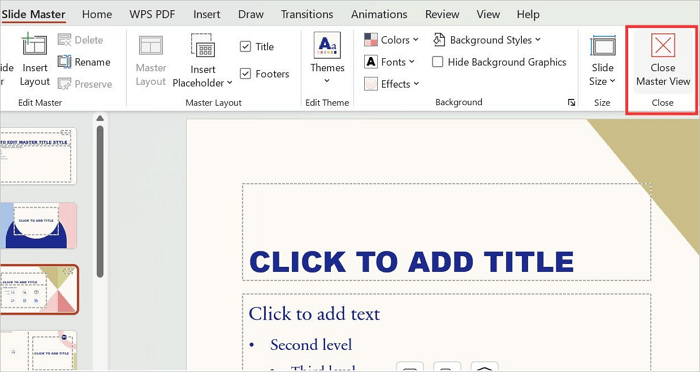
Step 1: Open Slide Master View
Go to the View tab in your PowerPoint presentation and select Slide Master.
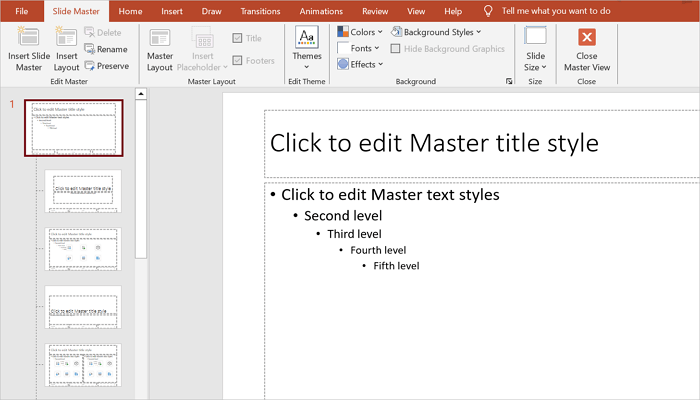
Step 2: Choose the Correct Master Layout
Review the layouts in the left panel, then click the one that contains the background graphic you want to modify.
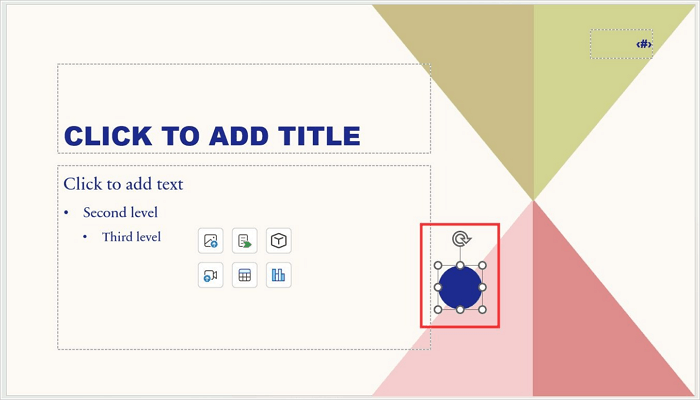
Step 3: Locate the Graphic
Click the logo, shape, or design element and confirm its selection handles are visible.
Step 4: Edit or Delete the Element
Once selected, resize, reposition, reformat, or delete the graphic using the Delete key.
Step 5: Close Slide Master
Click Close Master View and review the updated slides in normal view.
2. Edit Background Graphics in PowerPoint on Specific Slides
There may be situations when you need to edit background graphics in PPT on certain slides. Here, you don’t need to modify the entire presentation template like you would when using the Slide Master. This approach is ideal for creating title slides, section breaks, or custom layouts.
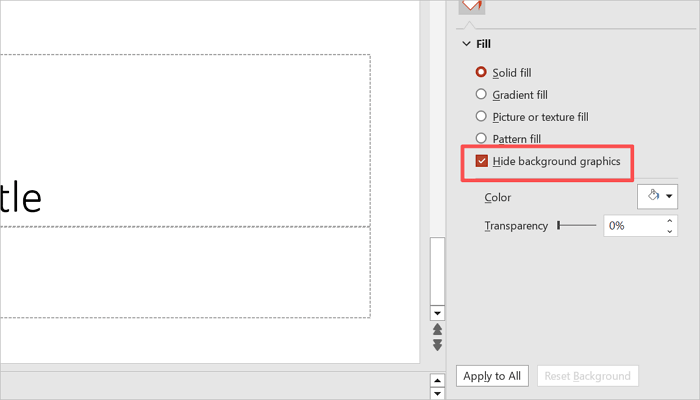
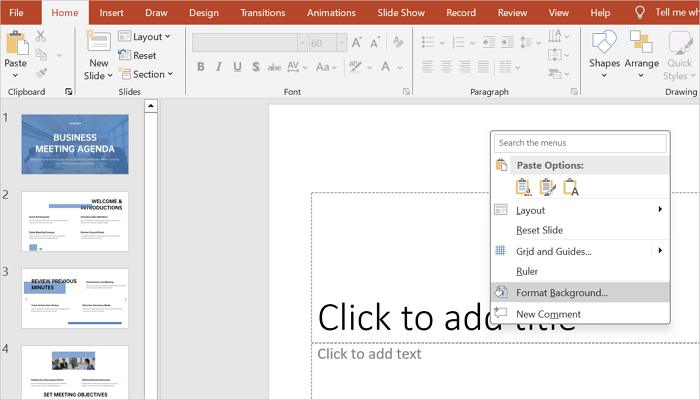
Step 1: Open Format Background Menu
Right-click on the slide you want to edit and click Format Background.

Step 2: Check “Hide Background Graphics”
Check the Hide background graphics option to remove graphics coming from the Slide Master, or use any of the Fill options to adjust background graphics.
Step 3: Review Your Slide
Confirm that the background graphic for that specific slide is now hidden.

Step 4: Return to the Normal Slide View
Close the Format Background panel after applying the preferred settings.

3. Change Background Graphics in PowerPoint
Instead of simply removing them, you can also change background graphics in PowerPoint and give your slides a whole new look. It also comes in handy when you need to refresh outdated templates or improve branding.
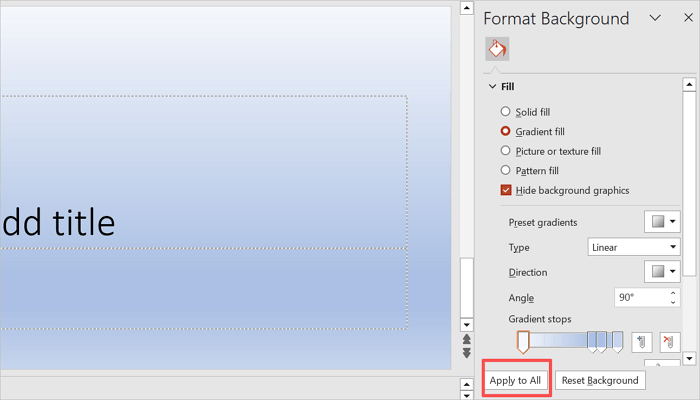
Step 1: Open the Format Background panel
Right-click on the slide you want to edit and click Format Background.
Step 2: Choose a Fill Type
Select from Solid fill, Gradient fill, Picture or texture fill, and Pattern fill.

Step 3: Customize the Fill
Modify the color, transparency, brightness, or texture for the Fill type you select.

Step 4: Apply the Settings to All Slides (Optional)
Click on Apply to All if you want to apply the background to every slide in your presentation.
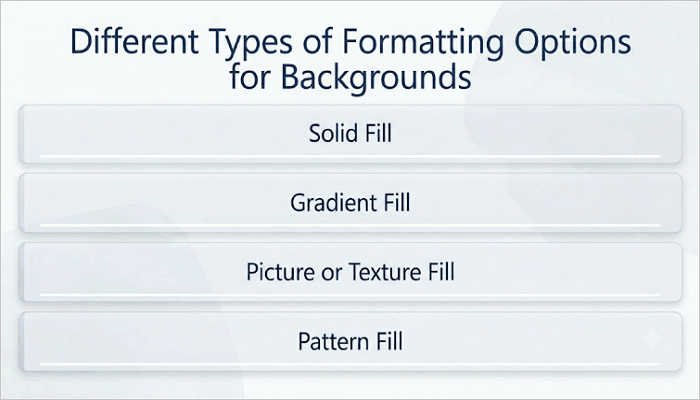
Different Types of Formatting Options for Backgrounds
You’ll find various formatting options in PowerPoint, with each one affecting both the aesthetics and readability of your presentation. Let’s explore the most common types.
- Solid Fill: This features a flat color covering the entire slide background. It is ideal for corporate presentations where clarity and brand consistency are crucial.
- Gradient Fill: A smooth transition between two or more colors. Gradients add visual depth to your presentation without using images and work well for tech, design, or startup presentations.
- Picture or Texture Fill: Here, an image or texture pattern fills the slide background. It is best for creating branded or themed presentations, such as event decks.
- Pattern Fill: This creates a repeating two-color geometric pattern that can add a subtle visual interest to your presentation when used with muted colors.
Refine PowerPoint Backgrounds Faster With AiPPT.com
Traditional background editing in Microsoft PowerPoint often requires adjusting multiple slides manually. This can become time-consuming when presentations contain inconsistent layouts or outdated design elements.
AiPPT.com helps simplify this process through its AI-powered presentation and design tools. The platform lets you generate presentations, improve layouts, optimize visual consistency, and enhance slide appearance more efficiently without relying on PowerPoint or Google Slides.
💡 Here’s how to use AiPPT.com to generate presentations with cleaner background designs.
Step 1: Go to AiPPT.com and sign in using your preferred option.
Step 2: Generate slides from an idea, document, or URL.
Step 3: Review the outline and select a theme or background style to continue.
Step 4: Download your PPT or click Edit to customize your slides using the built-in tool.

Conclusion
When you know how to edit background graphics in PowerPoint, it becomes easier to work with templates, company branding, and shared presentation slides.
One practical tip many PowerPoint users overlook is checking the Slide Master first when a graphic cannot be selected. To save yourself considerable troubleshooting time, always check whether a graphic exists in the main Slide Master or in a specific layout.
Now you can review your most frequently used templates and try updating outdated graphics using the Slide Master or Format Background menu.
Learn More About Background Graphics in PowerPoint
Background graphics can sometimes behave differently depending on the PowerPoint version you’re using. The answers below cover some of the most common questions other users encounter.
1. How do you change the background on PowerPoint on Mac?
To modify background graphics in PowerPoint on Mac:
- Open your PowerPoint presentation.
- Select the slide you want to edit in the left panel.
- Go to the Design tab and click Format Background.
- Choose your preferred fill type from the menu.
- Click Apply to All to update all slides in your presentation or simply close the panel to apply only to the selected slide.
2. How do you edit background graphics in PowerPoint Online?
Here’s how to edit background graphics in PowerPoint for the web:
- Open your presentation in PowerPoint Online.
- Select the slide you want to modify.
- On the Design tab, select Background.
- Choose from Solid Fill or Insert Picture Format Background options.
- Click Apply to All to update the entire presentation.
3. How to remove background graphics in PowerPoint?
To remove a background graphic in your PowerPoint presentation:
- Open your presentation and select the slide that has the picture you want to remove.
- Go to the Design tab and select Format Background from the Customize group.
- Check the Hide background graphics box.
- Alternatively, proceed to the Slide Master to delete the graphic from there.