Even a great slide layout may not be effective if the background image is too harsh or the text over a graphic is nearly impossible to read. Sounds familiar? This is where knowing how to make an image transparent in Google Slides or make see-through images in slideshows comes in handy.
Instead of redesigning the entire slide, you can make images transparent in Google Slides with only a few clicks. This guide will also show you how to work with shape opacity settings and fix common issues that come up along the way.
Key Takeaways
- Learn how to adjust shape transparency in Google Slides to improve text readability.
- Understand where to find shape opacity controls and use them correctly.
- Fix common transparency issues quickly without redesigning your slides.
- Apply transparency effects confidently on desktop, Chromebook, and iPad devices.
1. Transparency in Google Slides and Common Uses
So you’re wondering: what is transparency, and how does it affect your slide design at school or work?
Transparency controls how visible an image or shape appears on your slide. For most Google Slides users, transparency is more about creating design balance than decorating the slide. Turn it up, and the element fades into the background; turn it down, and it stands out clearly.
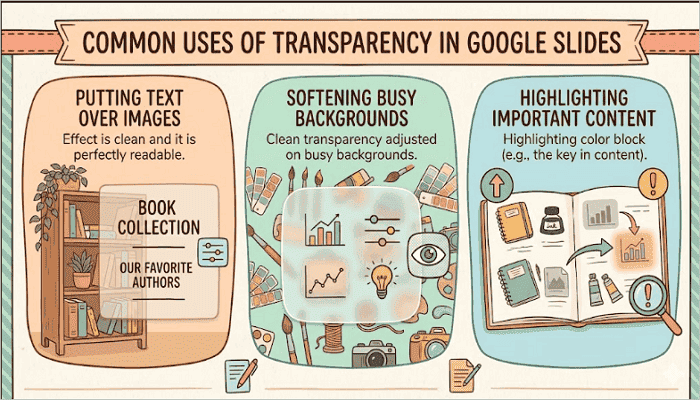
Here are common situations where you may need to adjust transparency in Google Slides:
- Putting text over images: Text should stand out and be easy to read when placed on images. Increasing image transparency helps you achieve this.
- Softening busy backgrounds: Some images may contain strong details that can distract or overpower the slide. You can keep the focus on your main content by increasing transparency.
- Highlighting important content: Transparent shapes are often placed behind titles or statistics to guide your audience’s attention toward key information on the slide.
2. How to Make an Image Transparent in Google Slides
When you begin to create more presentations in Google Slides, you will find yourself adjusting image transparency more frequently. Once you know where the controls are located, the entire process to make a photo transparent on Google Slides only takes a few clicks.
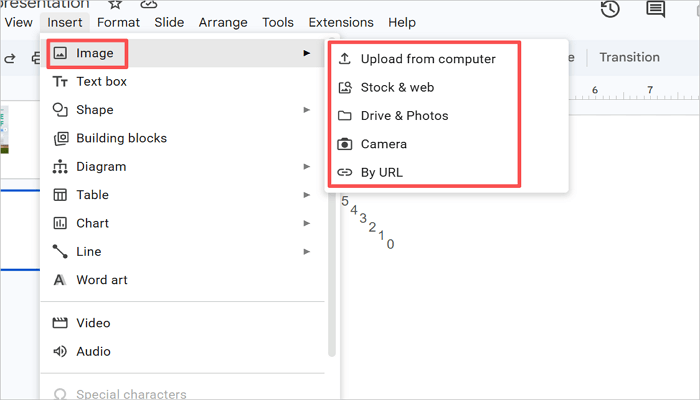
Step 1: Insert and Select Your Image
Open your Google Slides presentation and insert the image via Insert > Image. Choose your preferred upload option, place the image on the slide, and select it. A blue border should appear around it.
Without selecting the image properly, you won’t find image formatting tools on Google Slides.
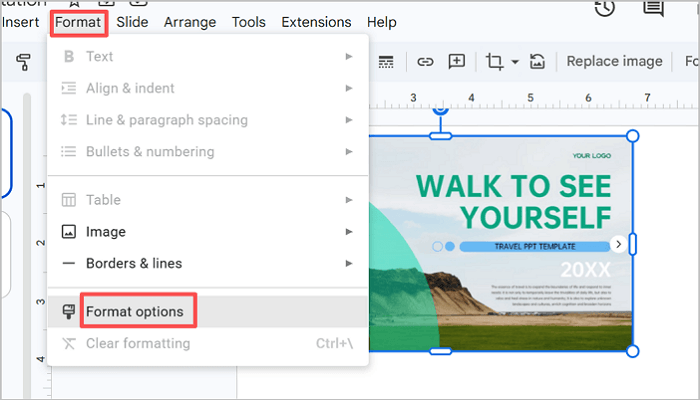
Step 2: Open Format Options
After you select the image, go to the toolbar and click Format options. Alternatively, right-click on the image and open Format options from the menu. A panel will appear on the right side of your screen containing several image adjustment settings.
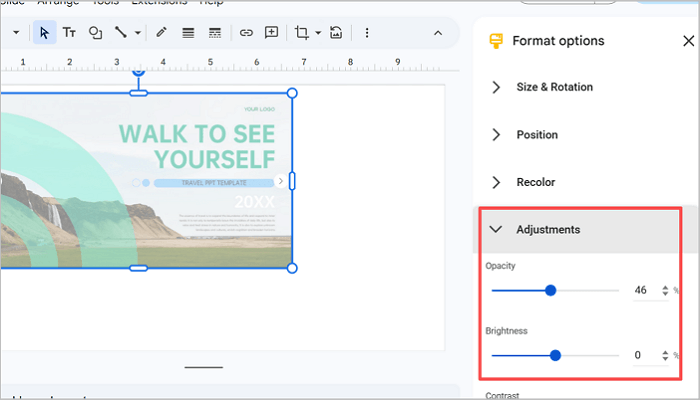
Step 3: Adjust Transparency Slider
Open the Adjustments section in the Format options panel. Here, you’ll use the Opacity slider to adjust image transparency. Drag the slider to the left to make the image more transparent (see-through) or to the right to make it more opaque (non-transparent).
3. How to Change Shape Opacity in Google Slides
As you did with images, you can also change shape opacity in Google Slides, but with a completely different approach. You will find the transparency control for shapes in the Fill color settings instead of the Opacity slider used for image transparency.
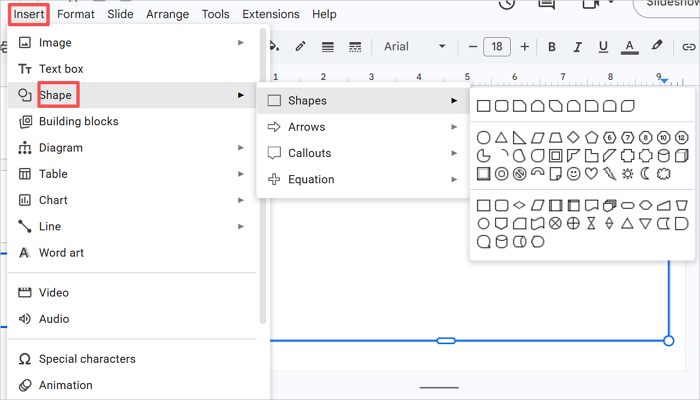
Step 1: Insert a Shape
Go to the toolbar in your Google Slides presentation and click Insert > Shape. Choose your preferred shape, then click and drag to place it on the slide.
After the shape appears, make sure it is selected before proceeding with any formatting settings
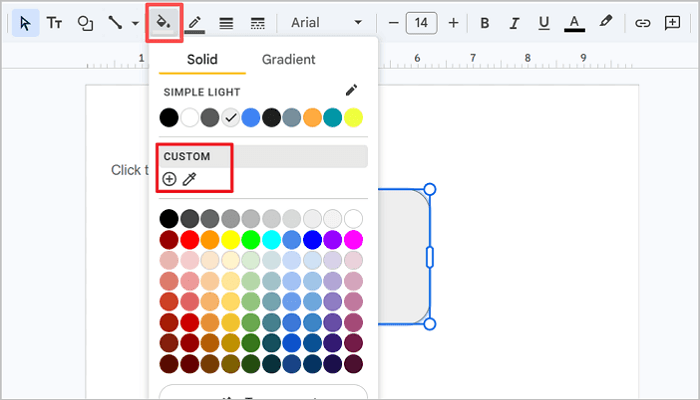
Step 2: Open Fill Color Settings
With the shape selected, click the Fill color button in the toolbar (the paint bucket icon). In the color menu, go to Custom and click the + icon to add a custom color.
This section contains transparency controls for shapes. Unlike images, shape opacity is connected directly to the fill color you select for it.
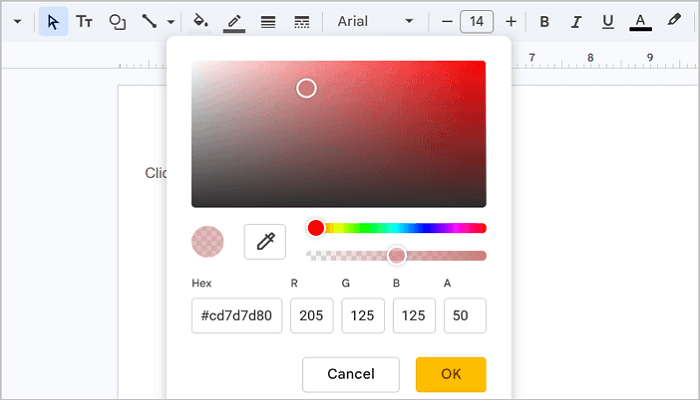
Step 3: Adjust Opacity Level
After that, the custom color panel should open. Here, you’ll see an opacity slider. Drag it to the left or right to make your shape more transparent or visible. You can also change the color or pick a specific color by adding the Hex color code. Then, click OK to apply the settings.
This adjustment comes in handy when you need to create overlays behind text, soft background accents, or subtle design elements that support your content without overpowering it.
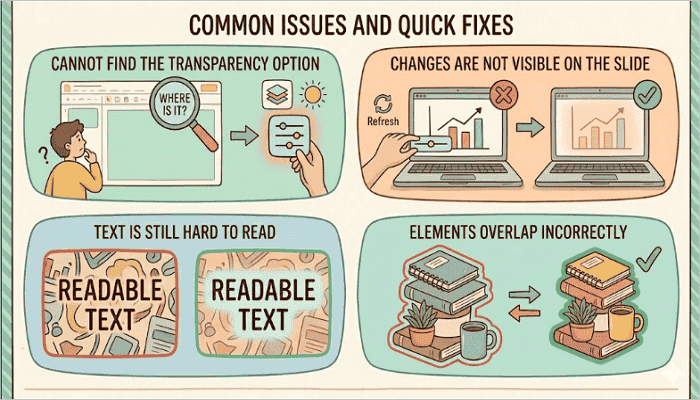
4. Common Issues and Quick Fixes
Sometimes, transparency settings do not work as expected when creating presentations. Here are a few common issues you may run into while trying to make a picture transparent in Google Slides.
- Cannot find the Transparency option: Make sure you’ve properly selected the image (until the blue handles appear) before going to the Format options menu.
- Changes are not visible on the slide: This can happen when you apply small opacity adjustments to an image that already has light colors. Increase the transparency level further for the change to reflect.
- Text is still hard to read: Instead of making the image extremely transparent, add a semi-transparent shape behind the text. This often creates a stronger contrast.
- Elements overlap incorrectly: Use Arrange > Order to move images or shapes forward and backward until the layering appears correctly.
Conclusion
You’ll be surprised to find out how well your presentations improve when you know how to make an image transparent in Google Slides. These adjustments may look small, but they make your slides cleaner, more professional, and easier to read without redesigning them from scratch.
The next time you open a deck, try adjusting one image and one shape using the steps in this guide. You will likely notice an immediate improvement in how the slide reads and feels, like the text and image blending more beautifully. This makes your speech or presentation go more smoothly.
FAQs on Changing Opacity in Google Slides
Want to know more about making images transparent in Google Slides? Here are answers to the most common questions about transparency settings, including how to work across different devices and platforms.
1. How to make a see-through image in slide shows?
To make a see-through image in slideshows:
- Open your Google Slides presentation.
- Insert the image onto your slide via Insert > Image.
- Right-click the image and open the Format options menu.
- Expand the Adjustments section.
- Move the Opacity slider to the left until the image becomes transparent (see-through).
2. How to change the opacity of a shape in Google Slides on iPad?
To change the opacity of a shape in Google Slides on iPad:
- Open the Google Slides presentation on your iPad.
- Select the shape you want to edit.
- Tap the Fill color button (paint bucket icon).
- Choose Custom color settings.
- Adjust the transparency slider to your preferred opacity level.
3. How to make images transparent on Google Slides on a Chromebook?
Here’s how you can make images transparent on Google Slides on your Chromebook:
- Open Google Slides in Chrome and insert your image.
- Then, right-click on the image and choose Format options.
- Expand the Adjustments section from the panel that opens on the right side of the screen.
- Move the Opacity slider to the left to increase the transparency of your image.