Putting the final touches on your class presentation, and want to breathe more life into the title slide?
Curved text in the title can immediately grab attention and give the presentation a more creative appearance. Although Google Slides does not have a built-in tool to curve text, that does not mean you are stuck with flat designs.
The good news is that there are practical workarounds anyone can use. You will find four easy to curve text in Google Slides in this article so that you can upgrade your presentation without additional software or design skills.
Can You Curve Text in Google Slides?
The short answer is no – Google Slides currently does not offer a built-in tool to curve or warp text. This is mainly because it is lightweight by design to support online collaboration and quick editing. Advanced text effects are not a part of its core tools.
However, this limitation does not mean that curved text is impossible.
With a few smart workarounds, you can still create curved text that looks clean and professional. The next sections of this article will walk you through four easy methods you can use right away.
1. How to Curve Text on Google Slides via PowerPoint Import
This method works best if you already use PowerPoint or need precise curved text effects. PowerPoint offers native text-warping tools, making it ideal for making logos or title slides. Once imported into Google Slides, the text retains its curved appearance but is no longer fully editable.
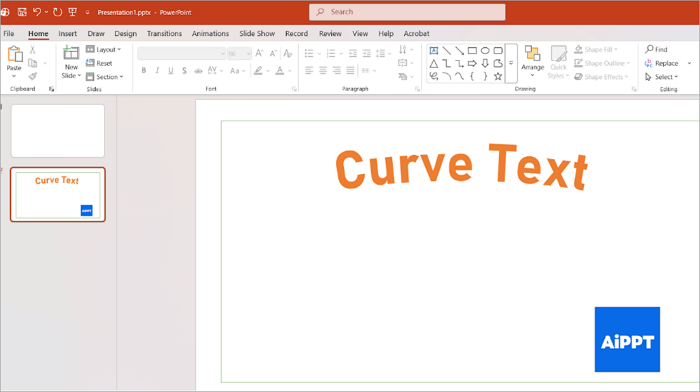
Step 1: Open PowerPoint
Open your PowerPoint presentation and insert a text Box.
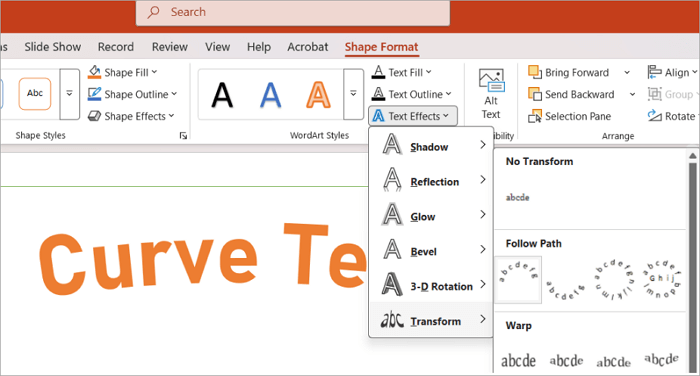
Step 2: Apply the curved effect
Go to the Shape format tab. using Text effects > Transform, apply a curved or circular style.
Step 3: Copy the slide
After adjusting the spacing and font size, use CTRL + C to copy the slide.
Step 4: Paste into Google Slides
Right-click on the slide and select paste to insert the copied image from PowerPoint to Google Slides.
2. How to Curve Text in Google Slides with Text Box Rotation
Text box rotation works inside Google Slides. It is simple and quick, without the need for extra tools. The trade-off is the precision, as the curve won’t be perfect. But this method to curve text on Google Slides will work well for short titles or decorative text.
Step 1: Add your text to the slide
Insert a text box and type your text. Keep it short.
Step 2: Duplicate the text box
Duplicate the text box by pressing CTRL + D several times. Each copy will later form part of the sentence curve.
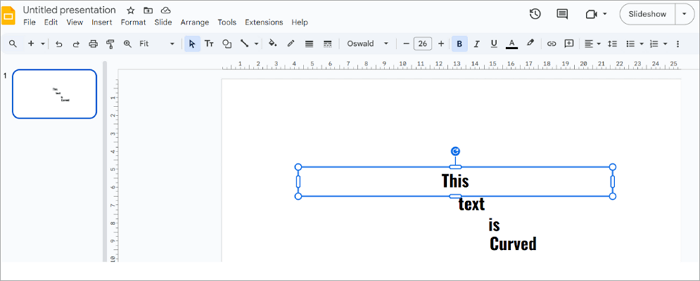
Step 3: Rotate each text box
Click on the text box. Hold the point at the top of the text box, then rotate the mouse until the text box is angled as required.
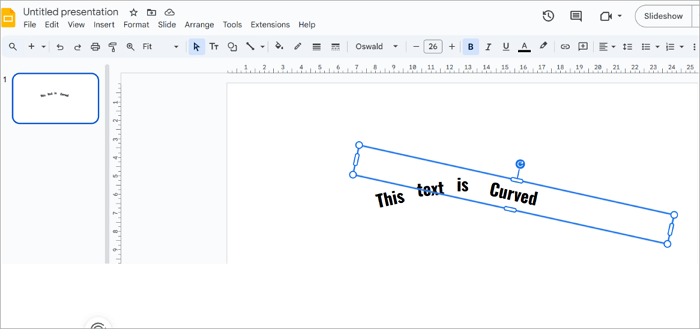
Text box rotation is simple, and you can adjust the curve, position, and text at any time. But the result is a little less sophisticated than the precision curve generated by PowerPoint tools.
3. How to Make Curved Text in Google Slides with Third-Party Tools
Using a third-party tool is often the easiest way to create smooth, polished curved text. These tools are built for visual effects, so the result usually looks more professional.
We will show you how to make curved text in Google Slides using Canva. But keep in mind that once you import the slide into Google Slides, it becomes an image and is no longer editable.
Step 1: Create a new design
Open Canva and go to New > Create a design. Add your text in the new design.
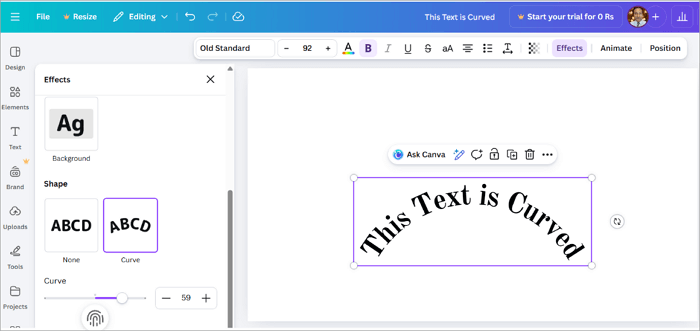
Step 2: Select a curved text effect
Select the text box, and then click Effects in the top menu to see the curved text effect. Adjust the curve, spacing, and size until you are happy with the result.
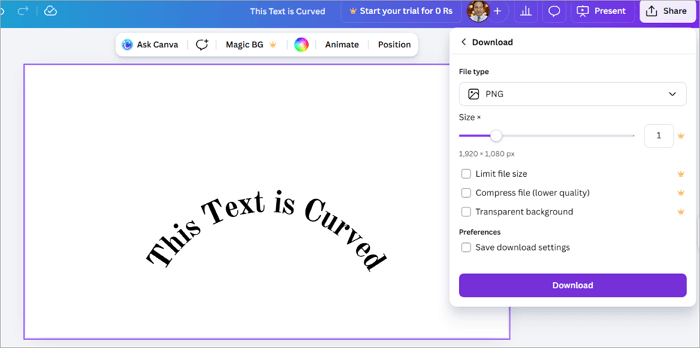
Step 3: Download your design.
Go to Share > Download and select PNG as the file type for best quality.
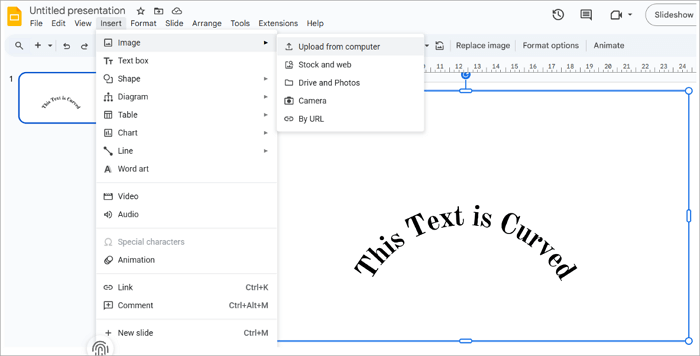
Step 4: Add to Google Slides
Open your Google Slides presentation and insert the downloaded file as an image.
4. How to Bend Text in Google Slides Using Google Apps Script
If you are comfortable with technical tools and like experimenting, Google Apps Script offers a more advanced path. This method is not for most users, but it can be useful if you want automation or custom behaviour in Google Slides.
The App script does not truly curve the text visually. Instead, it lets you place individual characters along a path. Before you try this, keep in mind that scripts can affect your presentation and require access approval.
Step 1: Go to Apps Script
Open Google Slides and go to Extensions > Apps Script.
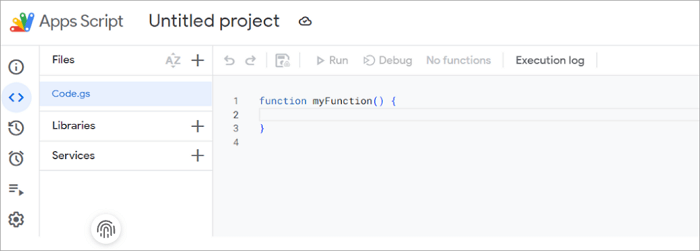
Step 2: Add a custom script
Paste the code /HTML files to add a new curved text menu to the Google Slides. The Script places each letter in a separate text box along an arc. Click run and accept any required authorizations.
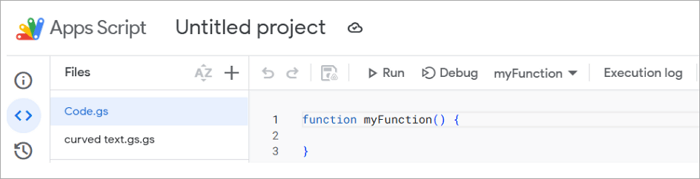
Step 3: The new menu will appear
In Google Slides, use the newly added menu to curve the text in the slide.
This approach is best for developers and advanced users, but comes with complexity and risk.
Common Challenges & How to Fix Them
You have added curved text to a Google Slide- But something feels off. But don’t worry, those are minor challenges, which we can fix.
| Problem | Quick Fix |
| 1. Curved text looks blurry in Google Slides | This usually happens when the image is downloaded at low resolution. Re-download the curved text from Canva as a PNG, using the largest possible file size. Avoid JPG files, which can lose sharpness. |
| 2. Curved text does not match your slide theme. | Once imported to Google Slides, the text cannot be edited. Match the font, color, and style in Canva before downloading. You can save brand colors and fonts in Canva for easy reuse. |
| 3. The text feels awkwardly placed on the slide. | Curved Text can look unbalanced when dropped randomly onto the slide. To fix it, use the alignment guides in Google Slides. Resize proportionately and center the curve around a clear focal point. |
Conclusion
Curved text may not be built into Google Slides, but as you have seen, that doesn’t affect your creativity. With the right workaround, you can curve text in Google Slides to instantly elevate your presentation.
Whether you choose a quick third-party tool or another method covered in this guide to bend text in Google Slides, the key is choosing what fits your project. Try one approach, experiment a little, and don’t stress about the perfection!
A small design touch, like a curved text, can make a big difference in how your presentation is seen.
Learn More About Google Slides Curved Text
Still have questions? You are not alone. Below are quick, practical answers to the most common problems in this topic.
1. Can you warp text in Google Slides on a Chromebook?
No, Google Slides on a Chromebook does not support text wrapping or curved text. However, you can use web-based tools like Canva to download the curved text as an image.
You can insert the saved image containing curved text into Google Slides afterwards.
2. How to curve a text box in Google Slides?
You can’t make curved text in Google Slides directly, but here is an easy workaround.
- Open Canva or a similar online tool.
- Add your text and apply a curved text effect. You can adjust the curve and spacing at this point.
- Download as a PNG file and upload to the Google Slides.
3. How to make curved text in Google Slides on Mac?
The process is the same on Mac since Google Slides runs on a web browser.
- Open Canva on Chrome or any browser.
- Create the curved text using text effects.
- Download as a high-resolution PNG file and insert it into Google Slides.