Pamphlets work really well for promoting events, products, services, or simply sharing information. However, limited space can make pamphlets look crowded if you try to include every detail.
To avoid overwhelming your audience with too much information, it helps to know how to prepare a pamphlet properly.
Key Takeaway
- Purpose shapes what content goes in the pamphlet.
- Structure guides readers through each panel.
- Good design improves clarity without adding clutter.
- Preparing and reviewing content before output makes the final result clean.
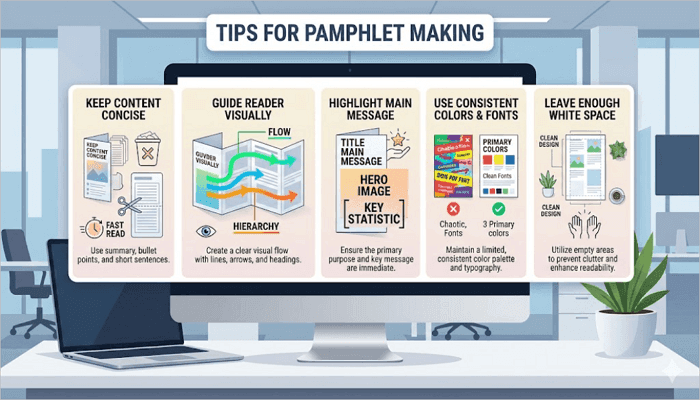
Tips for Pamphlet Making
Before jumping into the steps, a few practical tips can save you time and frustration during pamphlet making.
- Keep the content concise: Long paragraphs make pamphlets difficult to read. So focus on key points and remove unnecessary details.
- Guide the reader visually: Arrange the headings, images, and sections in a logical order. Your readers should immediately know where to begin.
- Highlight the main message: For example, if you are advertising a discount or event, place it in a visible section instead of hiding it in dense text.
- Use consistent colors and fonts: Too many styles can make the pamphlet feel cluttered and confusing for the audience.
- Leave enough white space: Empty space makes your text more readable and prevents panels from looking overcrowded.
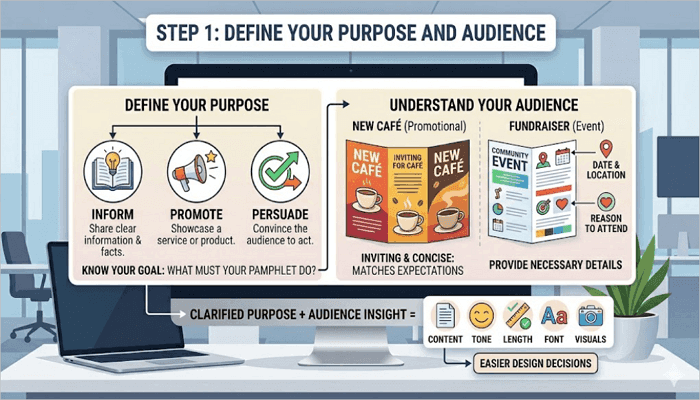
Step 1: Define Your Purpose and Audience
Your pamphlet must have a purpose before you start creating it. It could be to inform, promote, or persuade your audience to do something.
After defining its purpose, the next thing is to connect it to your audience’s expectations. For example, a promotional pamphlet for a new café should feel inviting and concise, while an event pamphlet for a community fundraiser needs dates, locations, and a reason to attend.
When you know the purpose and understand what your audience wants, it becomes easier to decide what content, tone, length, font, and visuals go into the pamphlet.
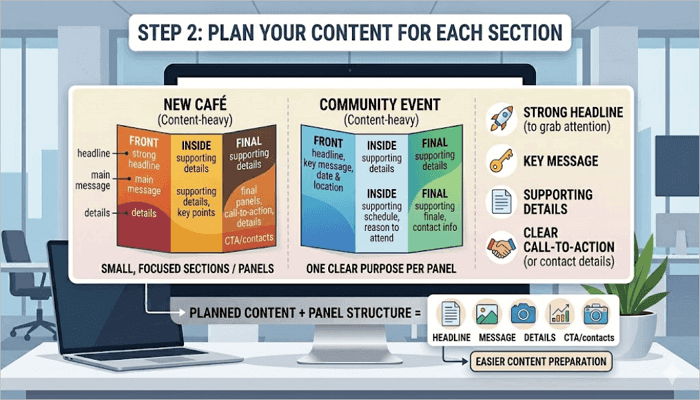
Step 2: Plan Your Content for Each Section
To get the best out of pamphlets, it helps to break the content into small, focused sections or panels, with each section having one clear purpose. This ensures that you don’t run out of space halfway through.
Important details to include in your pamphlet are:
- A strong headline to grab attention
- Key message
- Supporting details
- A clear call-to-action or contact details
For example, a restaurant pamphlet could use:
- Front panel: restaurant name and main offer
- Inside panels: menu highlights and pricing
- Final panel: location and contact details
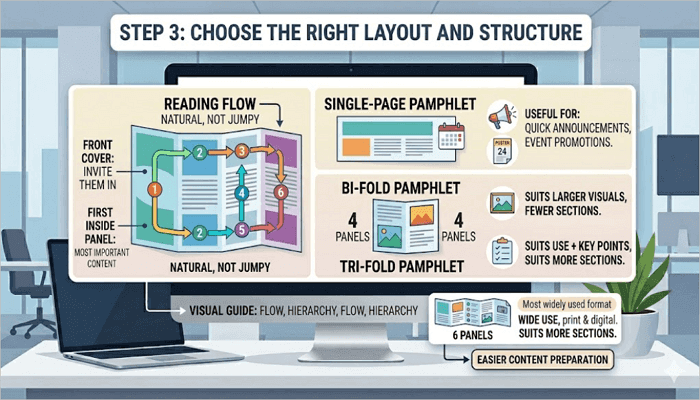
Step 3: Choose the Right Layout and Structure
Layouts directly affect how readers will move through your pamphlet. Choosing the wrong format can make even good content difficult to follow.
Some of the most common layout formats include:
- Single-page pamphlet: Useful for quick announcements or event promotions.
- Bi-fold pamphlet: Creates four panels and suits larger visuals and fewer sections.
- Tri-fold pamphlet: Creates six panels and is the most widely used format for both print and digital pamphlet designs.
The front cover should invite them in, while the first inside panel should carry the most important content. The reading flow should feel natural, not jumpy.
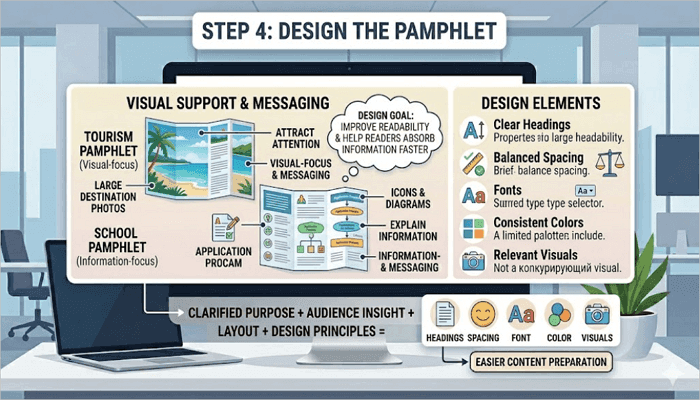
Step 4: Design the Pamphlet
The next step is to bring your pamphlet to life, and this is where design comes in handy. However, the goal of design at this stage is not just decoration; it is to improve readability and help readers absorb information faster.
Some of the elements to focus on include:
- Clear headings
- Balanced spacing
- Fonts
- Consistent colors
- Relevant visuals
Use visuals that support the message of your pamphlet, not compete with it. For example, a tourism pamphlet may use large destination photos to attract attention, while a school pamphlet may use icons and diagrams to explain information more clearly.
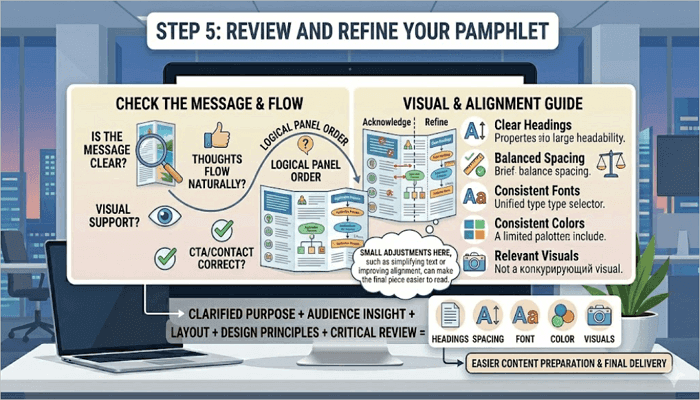
Step 5: Review and Refine Your Pamphlet
After completing the draft, take some time to review everything from a reader’s perspective. This way, you can easily spot errors you might miss when preparing the pamphlet.
Here are some things to check when reviewing your pamphlet:
- Is the message clear?
- Does the content flow naturally?
- Do visuals support the message?
- Is the contact information or call-to-action correct?
- Do the panels flow in a logical order?
- Is the visual hierarchy consistent?
- Are headings easy to spot?
- Are the text boxes and images properly aligned?
Small adjustments here, such as simplifying text or improving alignment, can make the final piece easier to read.
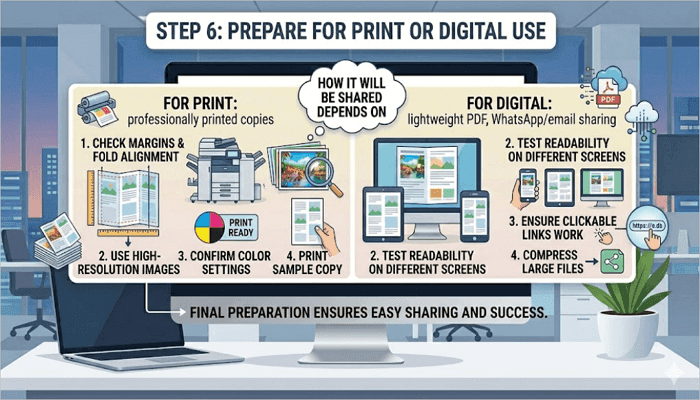
Step 6: Prepare for Print or Digital Use
The way you finalize your pamphlet depends entirely on how it will be shared, whether for print or digital use.
For print:
- Check margins and fold alignment
- Use high-resolution images
- Confirm color settings for printing
- Print a sample copy first
For a digital pamphlet, however:
- Save the file in an accessible format like PDF
- Test readability on different screen sizes
- Ensure that clickable links work properly
- Compress large files to allow for easier sharing
For example, a school club promoting an event online may create a lightweight digital PDF for WhatsApp and email sharing. A retail business, however, may use professionally printed copies for customers in-store.
Conclusion
One thing about pamphlets is that readers will often go through them very quickly, so it is important to prioritize structure and clarity when designing them. This ensures that the audience immediately understands the main message without searching through dense content.
Before going ahead to prepare a pamphlet for your product, service, or upcoming event, plan each design panel by panel—know what each section needs to say and why before you start designing.
Learn More About Making a Pamphlet
How to create pamphlets using tools you already have access to? The questions below address some of the most common methods for making pamphlets in Word, designing for a classroom, or using Google Docs.
1. How to prepare a pamphlet in Word?
To prepare a pamphlet in Microsoft Word using templates:
- Open Word and go to File > New.
- Search for a brochure or pamphlet to find available templates.
- Select one that matches your fold style.
- Customize the layout and margins under Layout > Margins.
- Add your content.
- Insert images through the Insert tab.
- Then, go to File > Print.
Ensure the printer is set to duplex (double-sided) printing so the panels align correctly when folded.
2. How to design a pamphlet for students?
Here’s how to design pamphlets for students:
- Define the topic clearly.
- Use simple language and short sections.
- Add colorful visuals or icons.
- Organize information into easy-to-read panels.
- Highlight important details like dates, instructions, or facts.
For new layout ideas, you can always review other pamphlet examples for students on the web.
3. How to make a pamphlet in Google Docs?
To create a pamphlet in Google Docs:
- Open a blank document.
- Change the page orientation to landscape in File > Page Setup.
- Use the Insert tab to add a table with three equal columns to create panels.
- Add titles, images, and content inside each section.
- Customize fonts and colors to make it more readable.
- Proceed to File > Download > PDF Document to download as a PDF for printing or online sharing.